Setting Up the Salesforce (SFDC) Integration in Veles
Last updated: September 29, 2025
The Salesforce integration allows Veles to push product, quote, and pricing data directly into your Salesforce environment. Follow the steps below to set up the integration correctly.
1. Enable the Integration
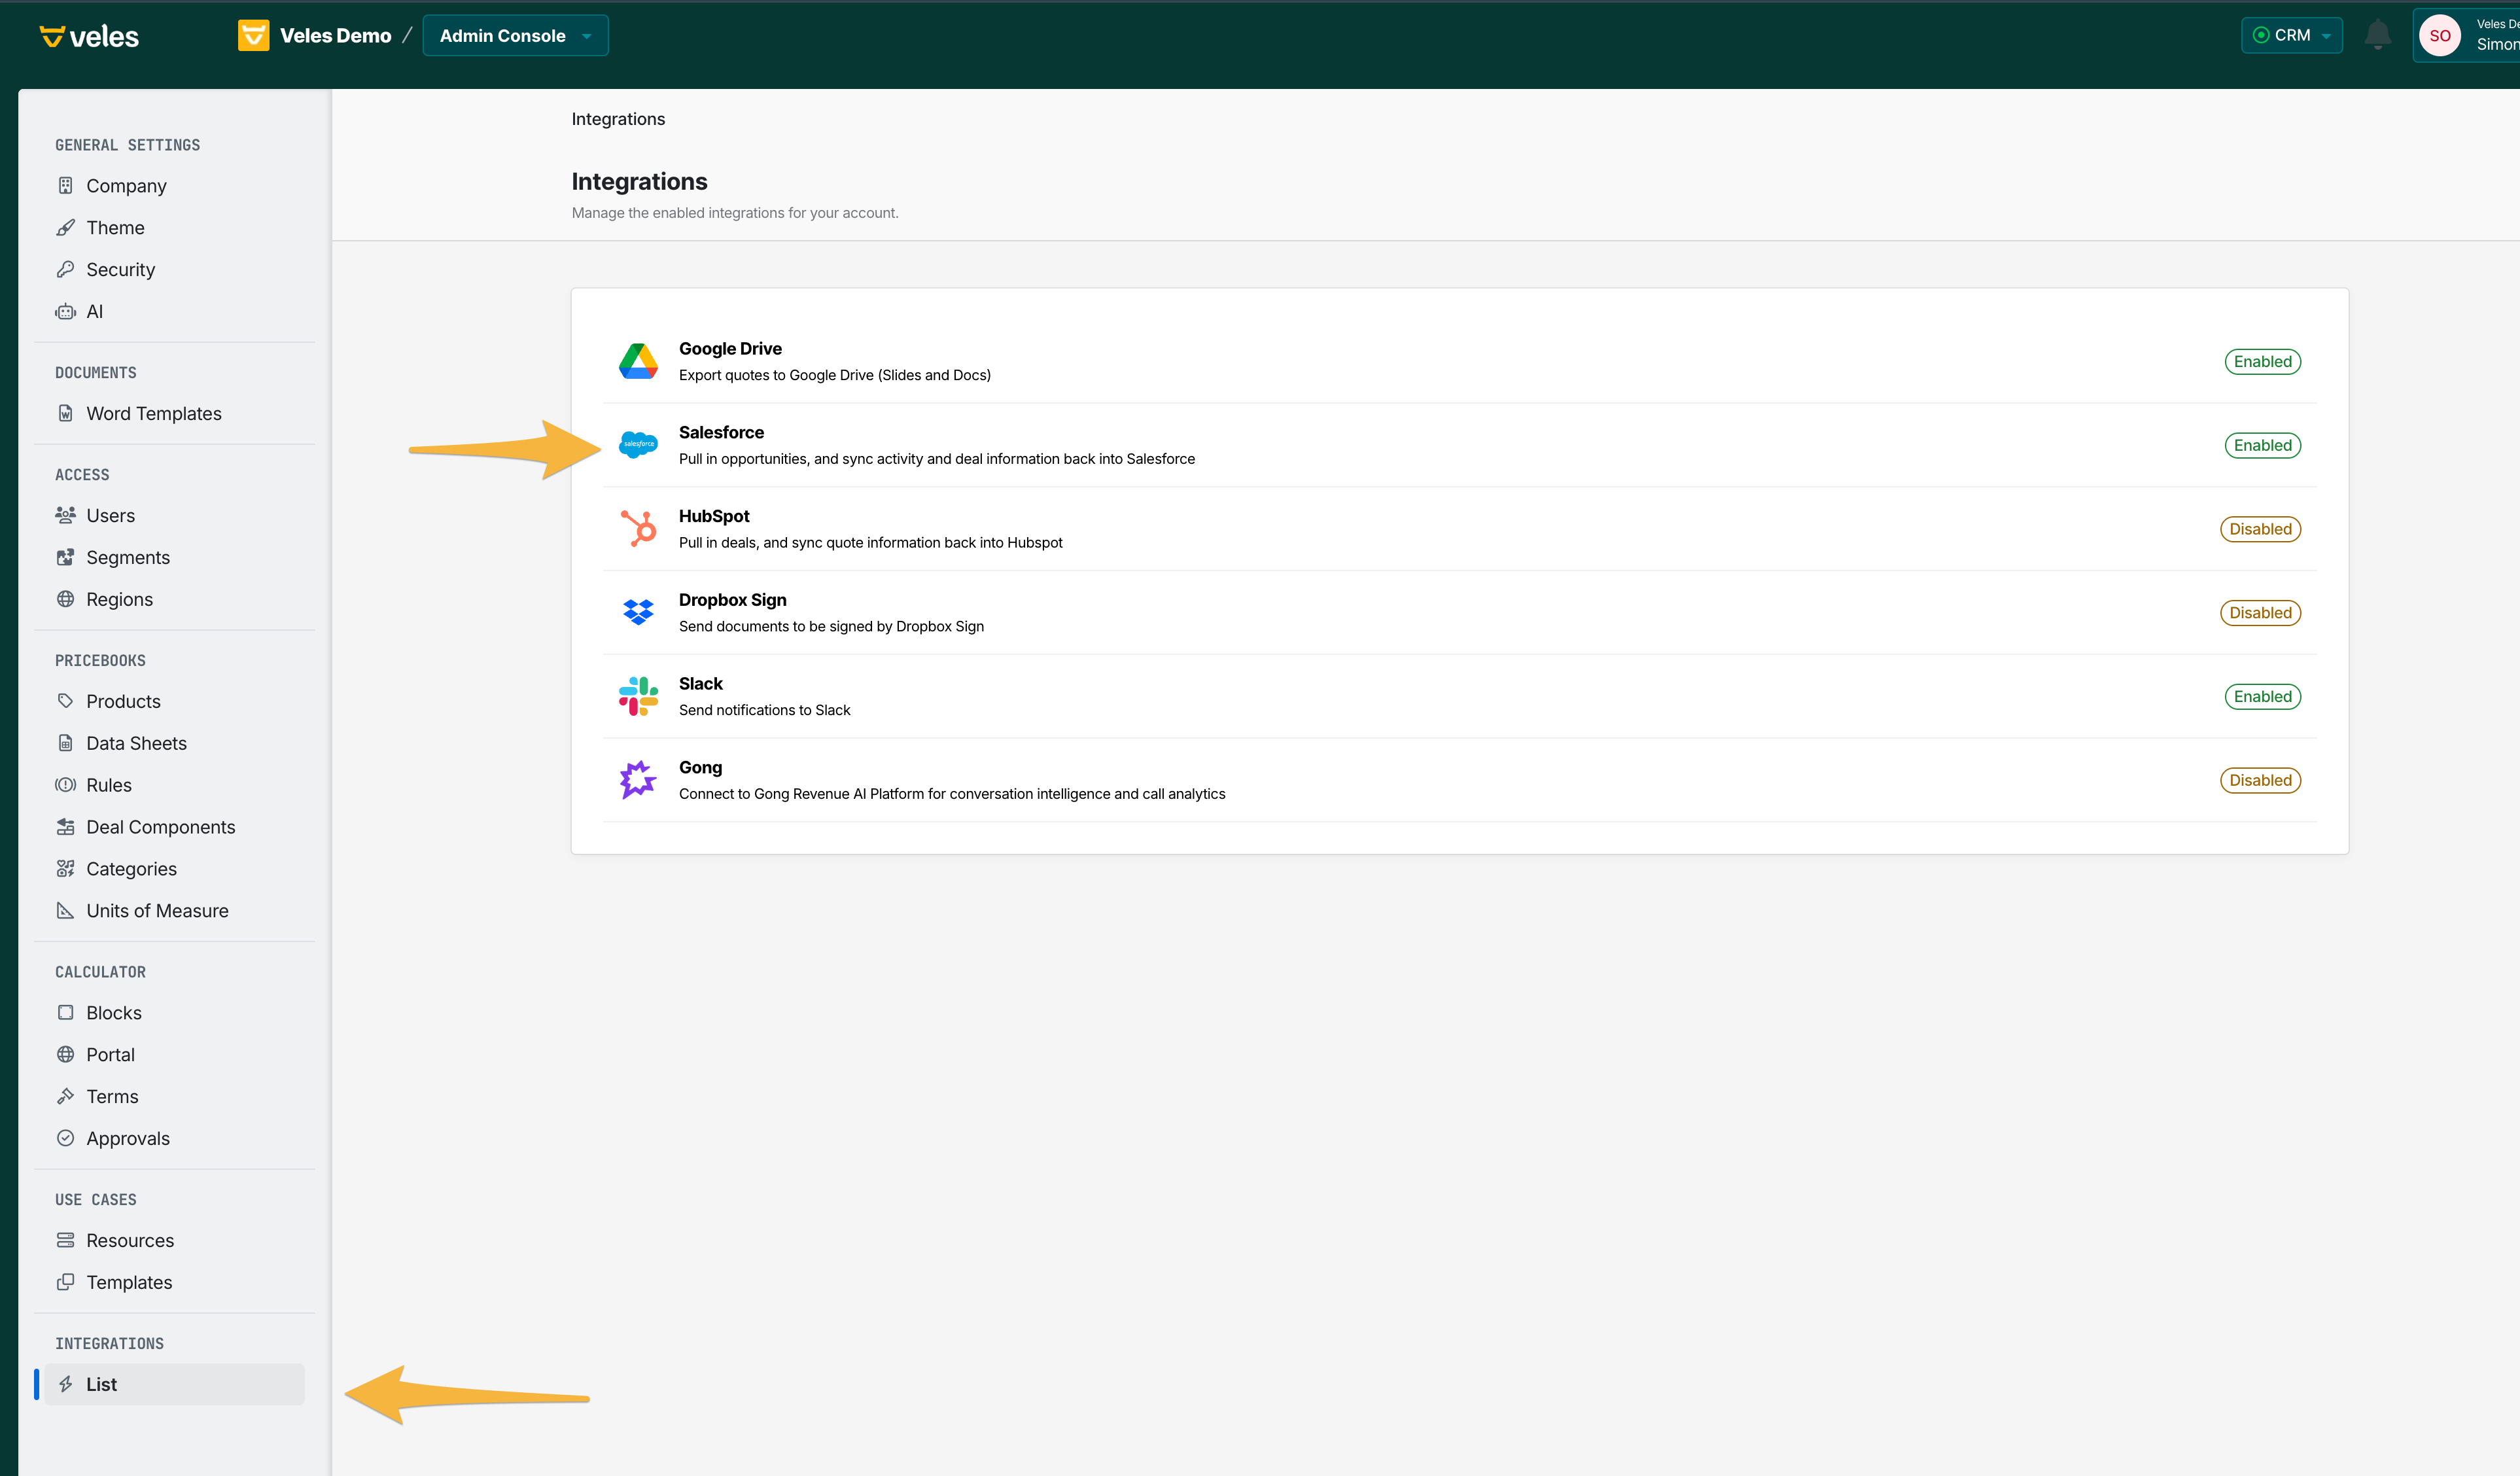
Navigate to Integrations within your Veles workspace.
Toggle Salesforce Integration to On.
2. Add Your Salesforce Instance URL
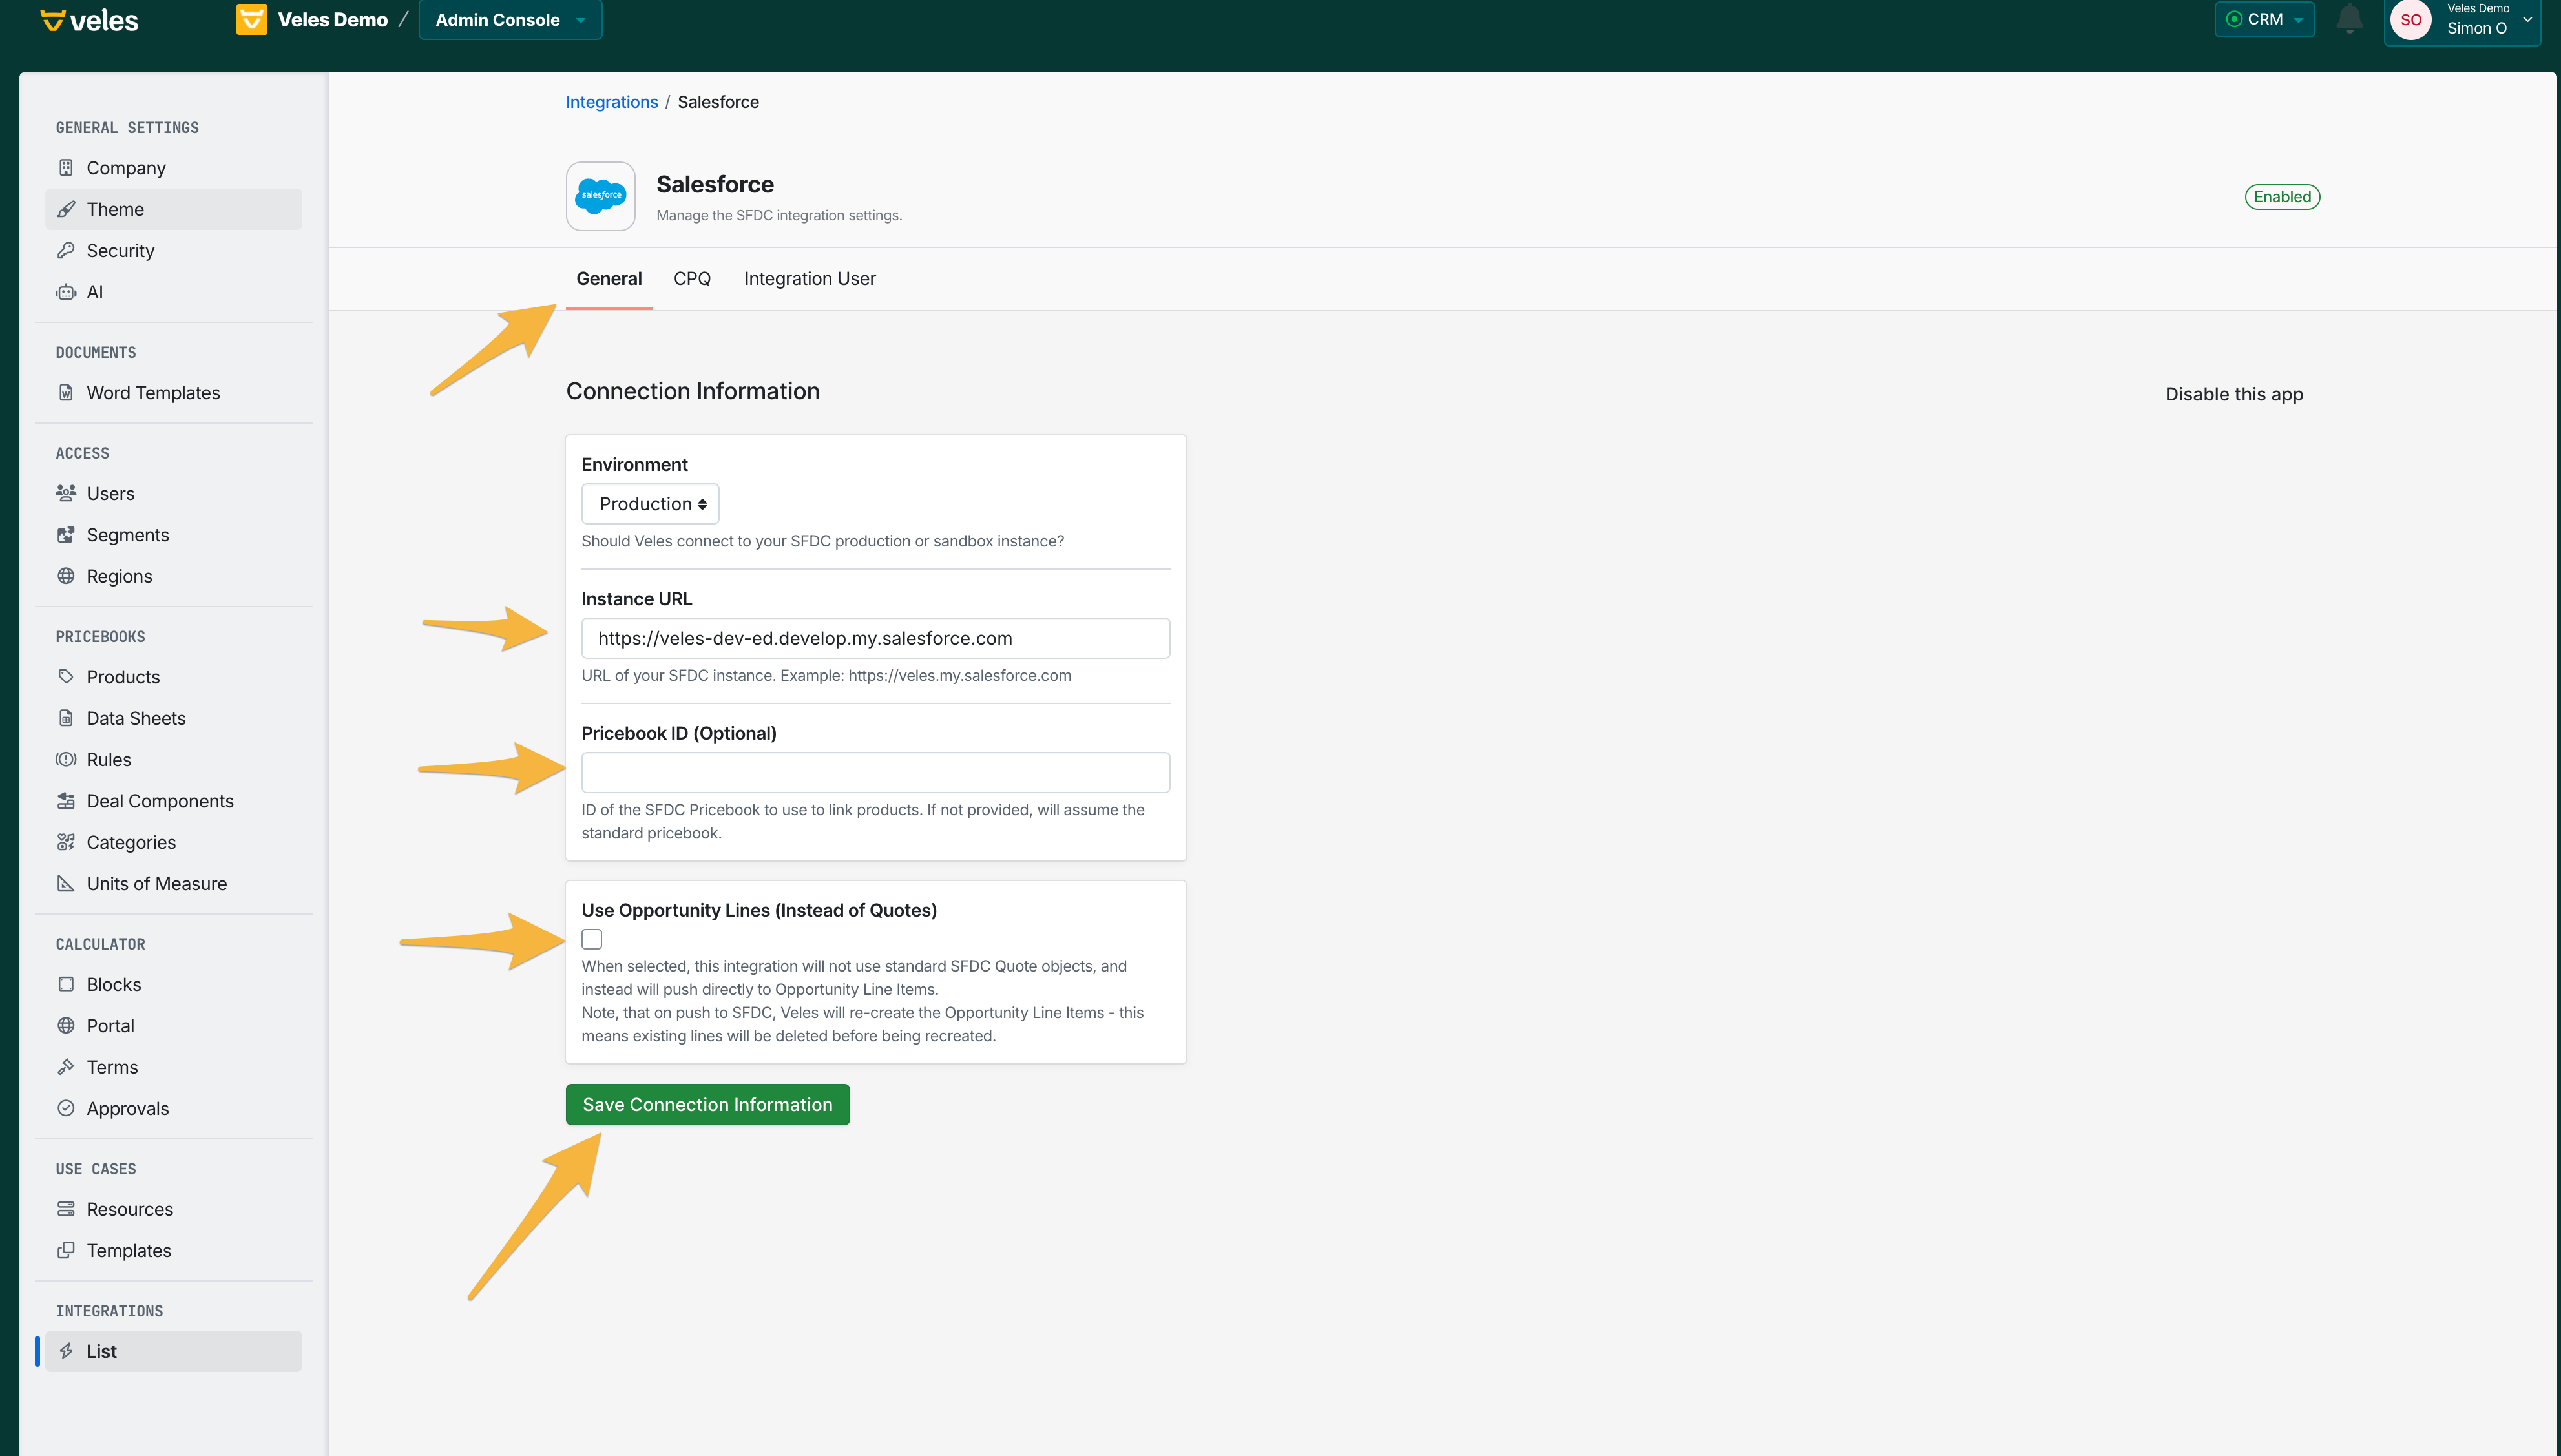
Enter the URL of your Salesforce instance into the Instance URL field.
Example:
https://yourcompany.my.salesforce.com
3. Choose What to Push
You can decide how Veles pushes data into Salesforce:
Quotes and Quote Lines (Default)
Veles pushes pricing data into Salesforce Quotes and Quote Lines.Opportunity Line Items
Alternatively, you can choose to push data directly into Opportunity Line Items.
4. Configure Pricebook
Using Standard Pricebook: No additional action required.
Using Custom Pricebook: Paste the Pricebook ID of your Salesforce pricebook into the Pricebook ID field.
5. Map Veles Products to Salesforce Products
The final step is ensuring products are correctly mapped between Veles and Salesforce:
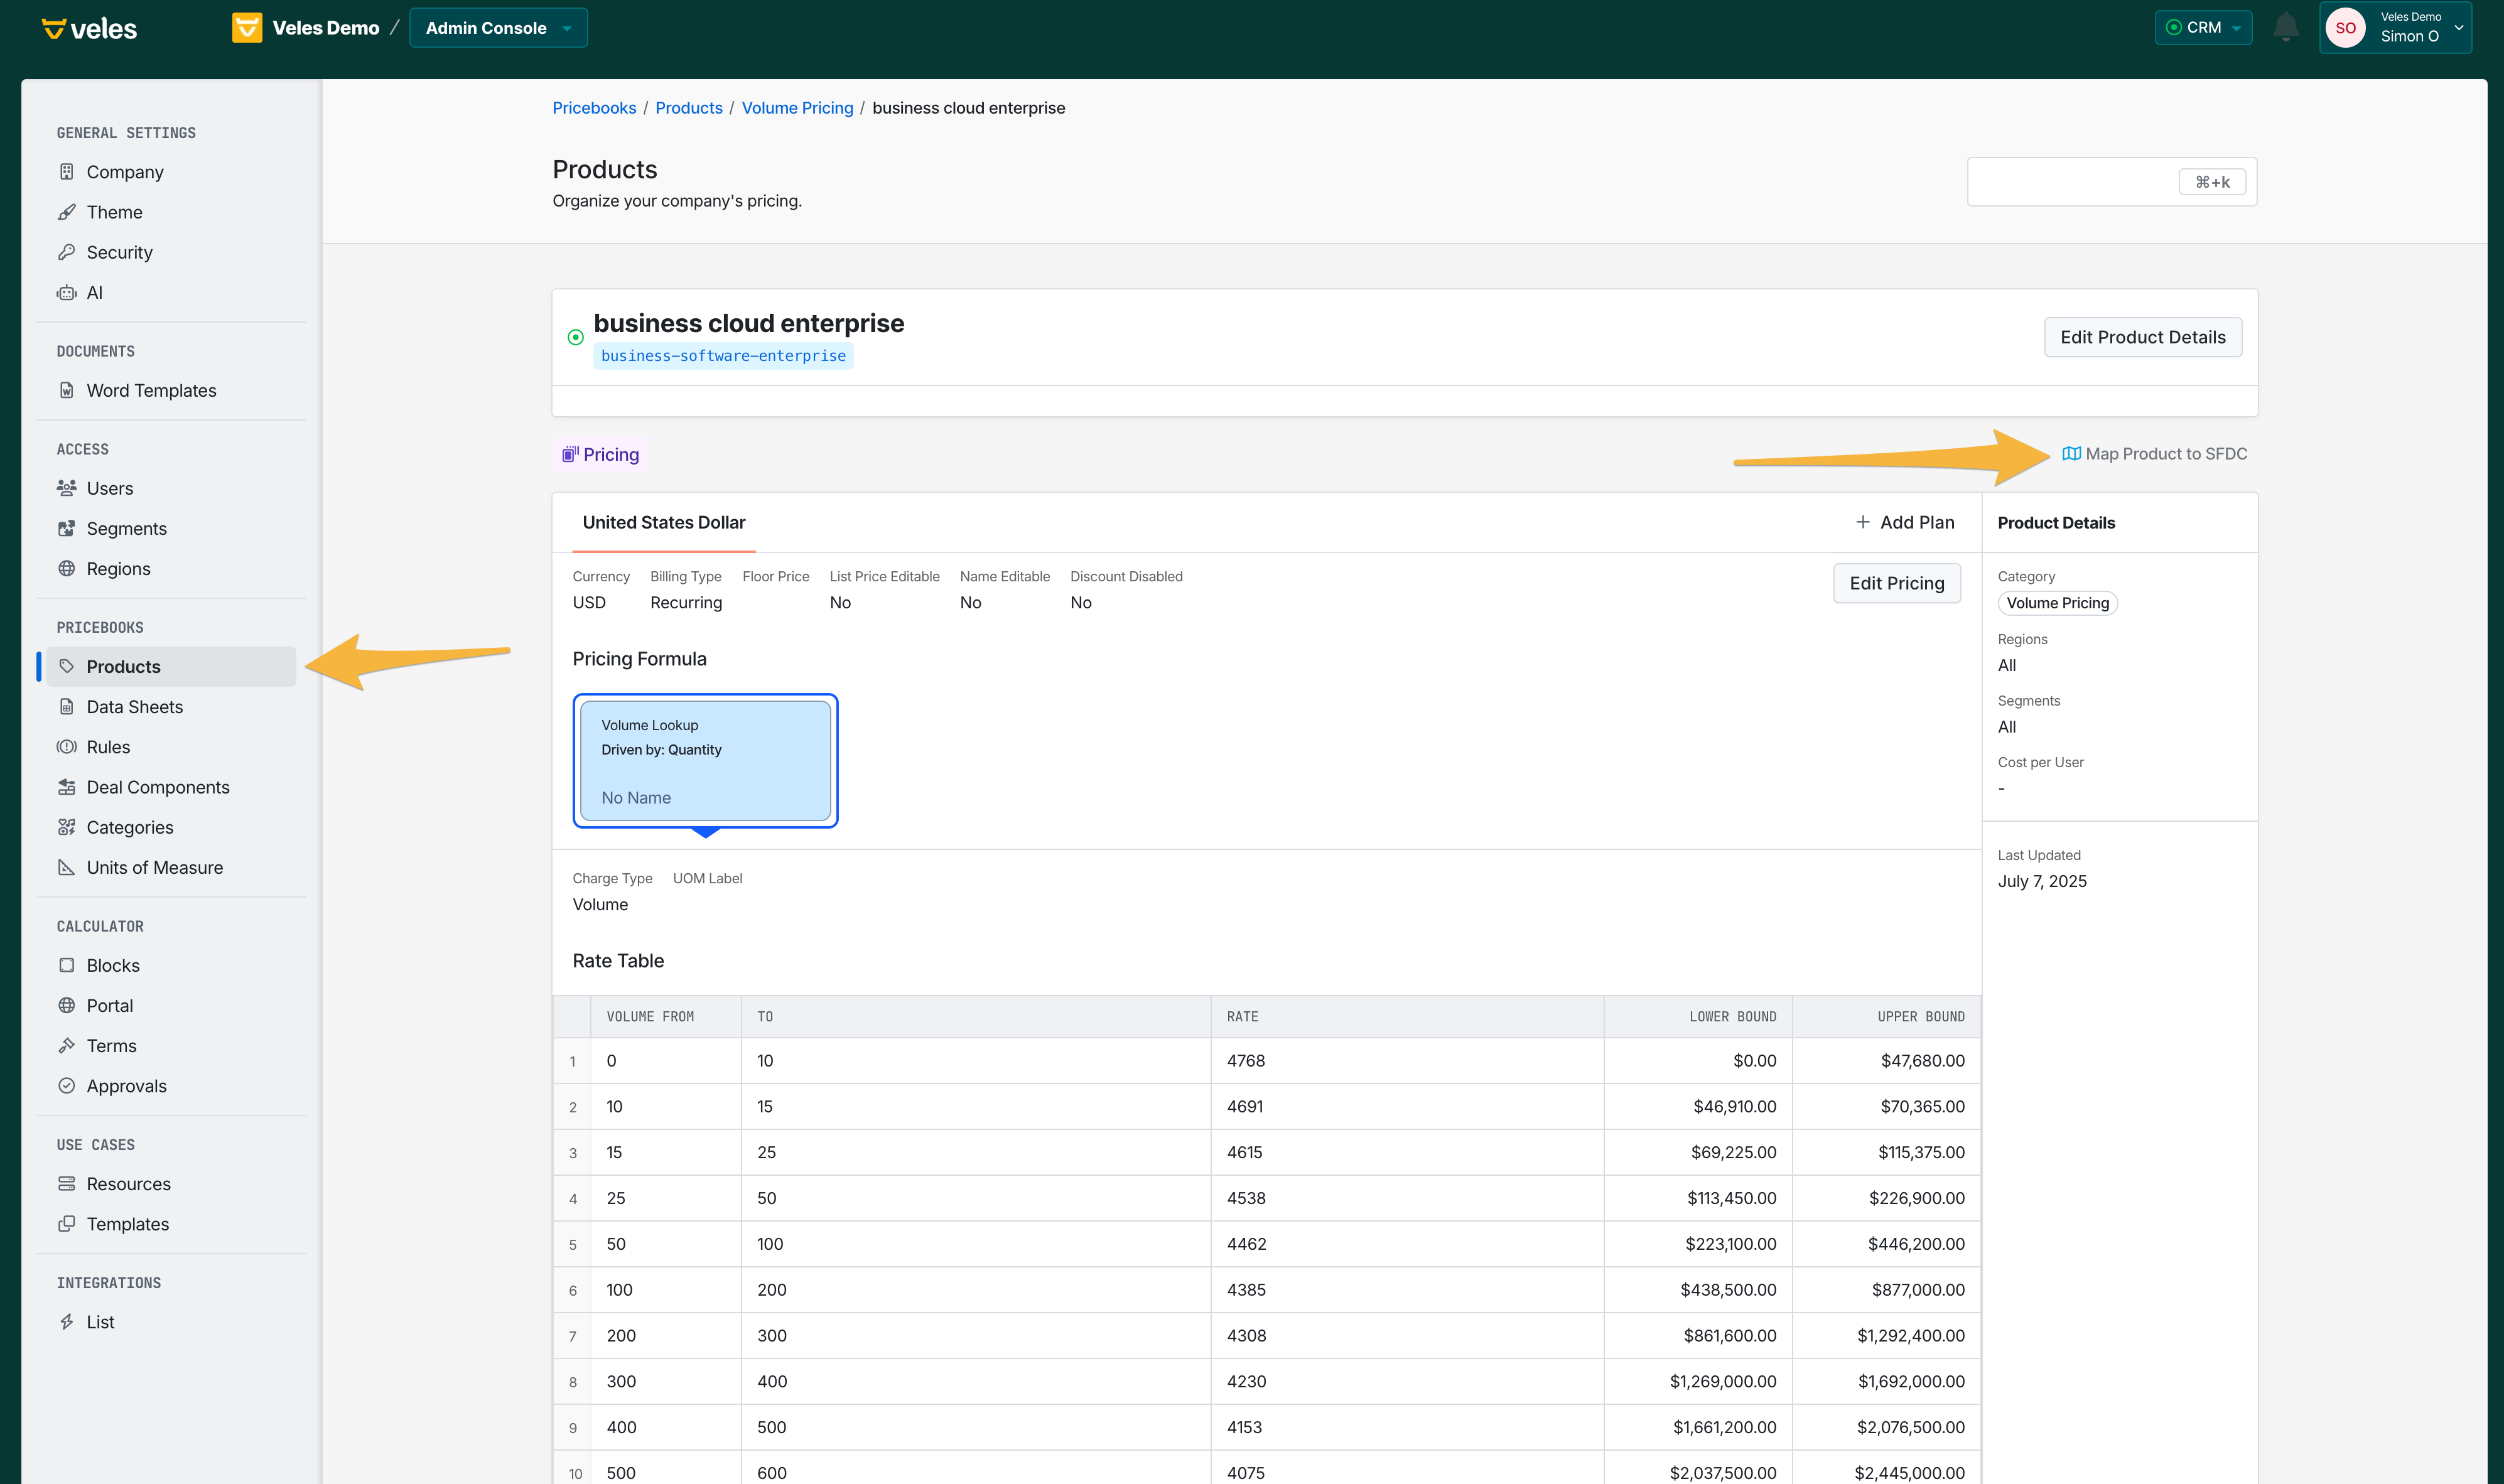
Each product in Veles must be mapped to a corresponding product in Salesforce.
1-to-1 Mapping is required for the push to succeed.
Advanced options allow:
1-to-Many mapping (one Veles product mapped to multiple Salesforce products)
Many-to-1 mapping (multiple Veles products mapped to one Salesforce product)
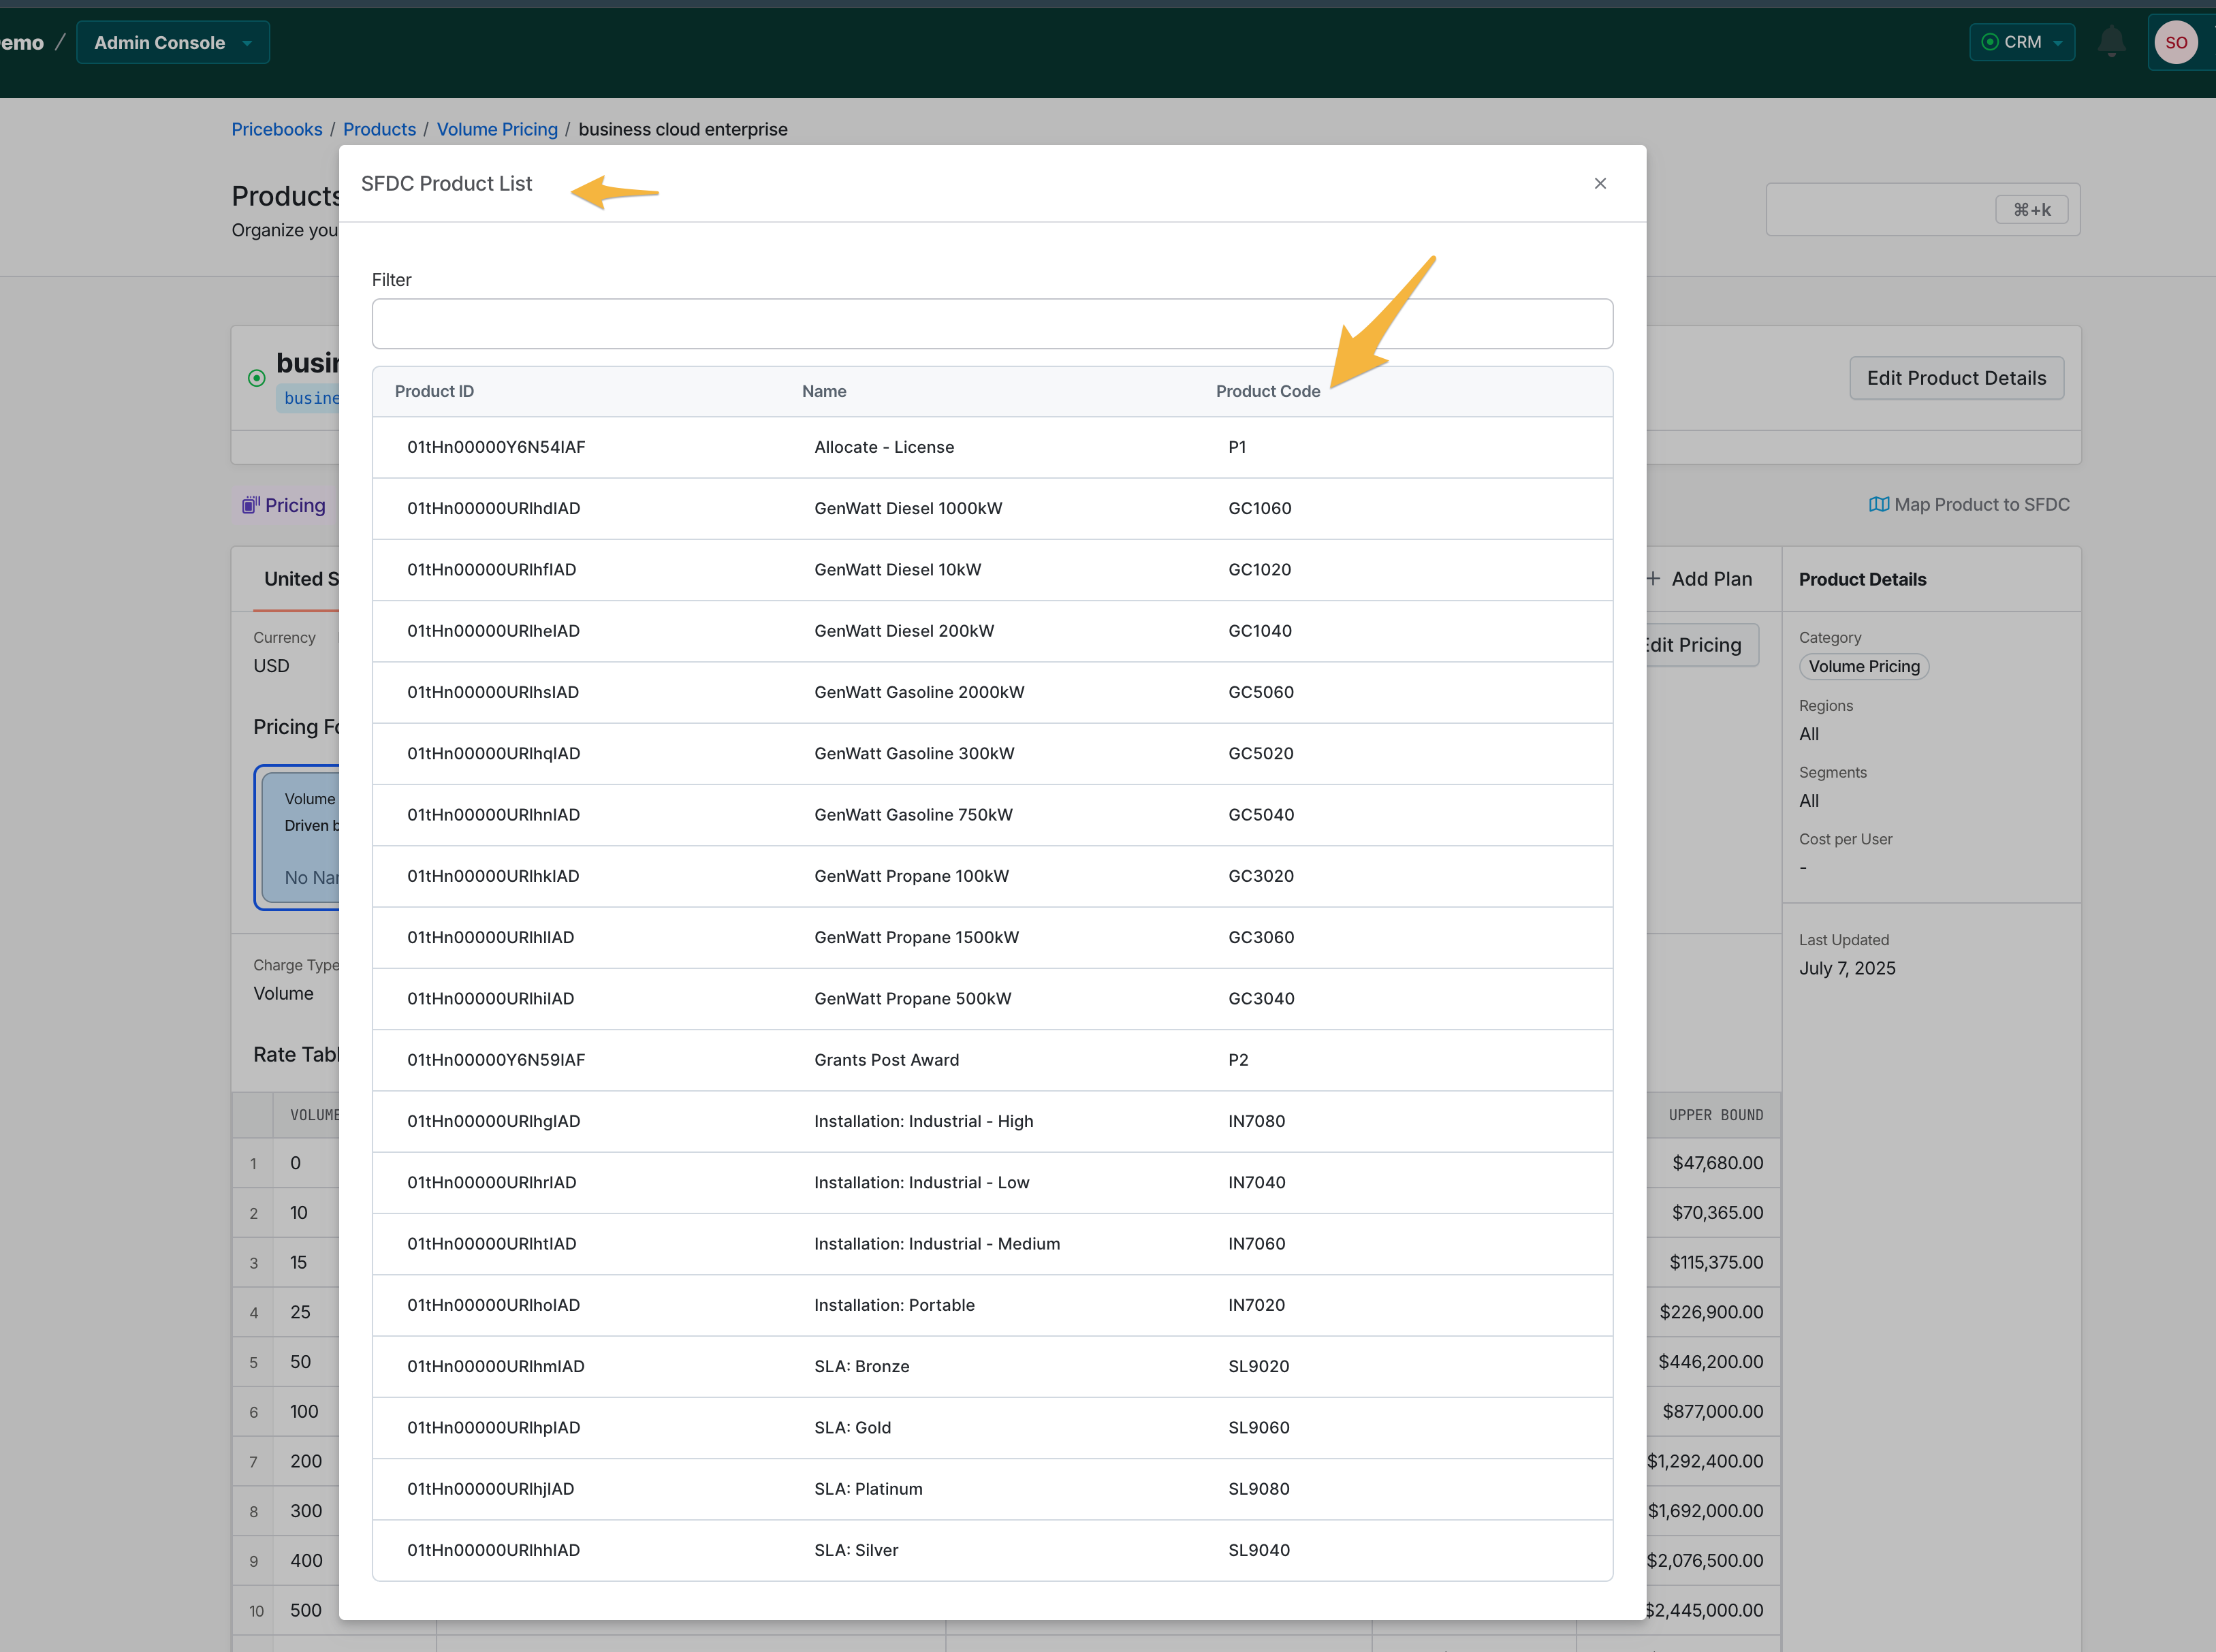
⚠ Important: If a product in Veles does not have a mapped Salesforce product, the push will fail.
✅ Your Integration Is Ready
Once all steps are completed, Veles will successfully push your quotes, pricing, and product data into Salesforce according to your chosen configuration.