SCIM: Okta Setup Instructions
Last updated: October 30, 2025
Okta Setup Instructions
The following document will outline how to configure Veles to support a SCIM integration with your Okta instance. Veles does not have a published Okta application yet - however only a couple extra steps are required to complete setup.
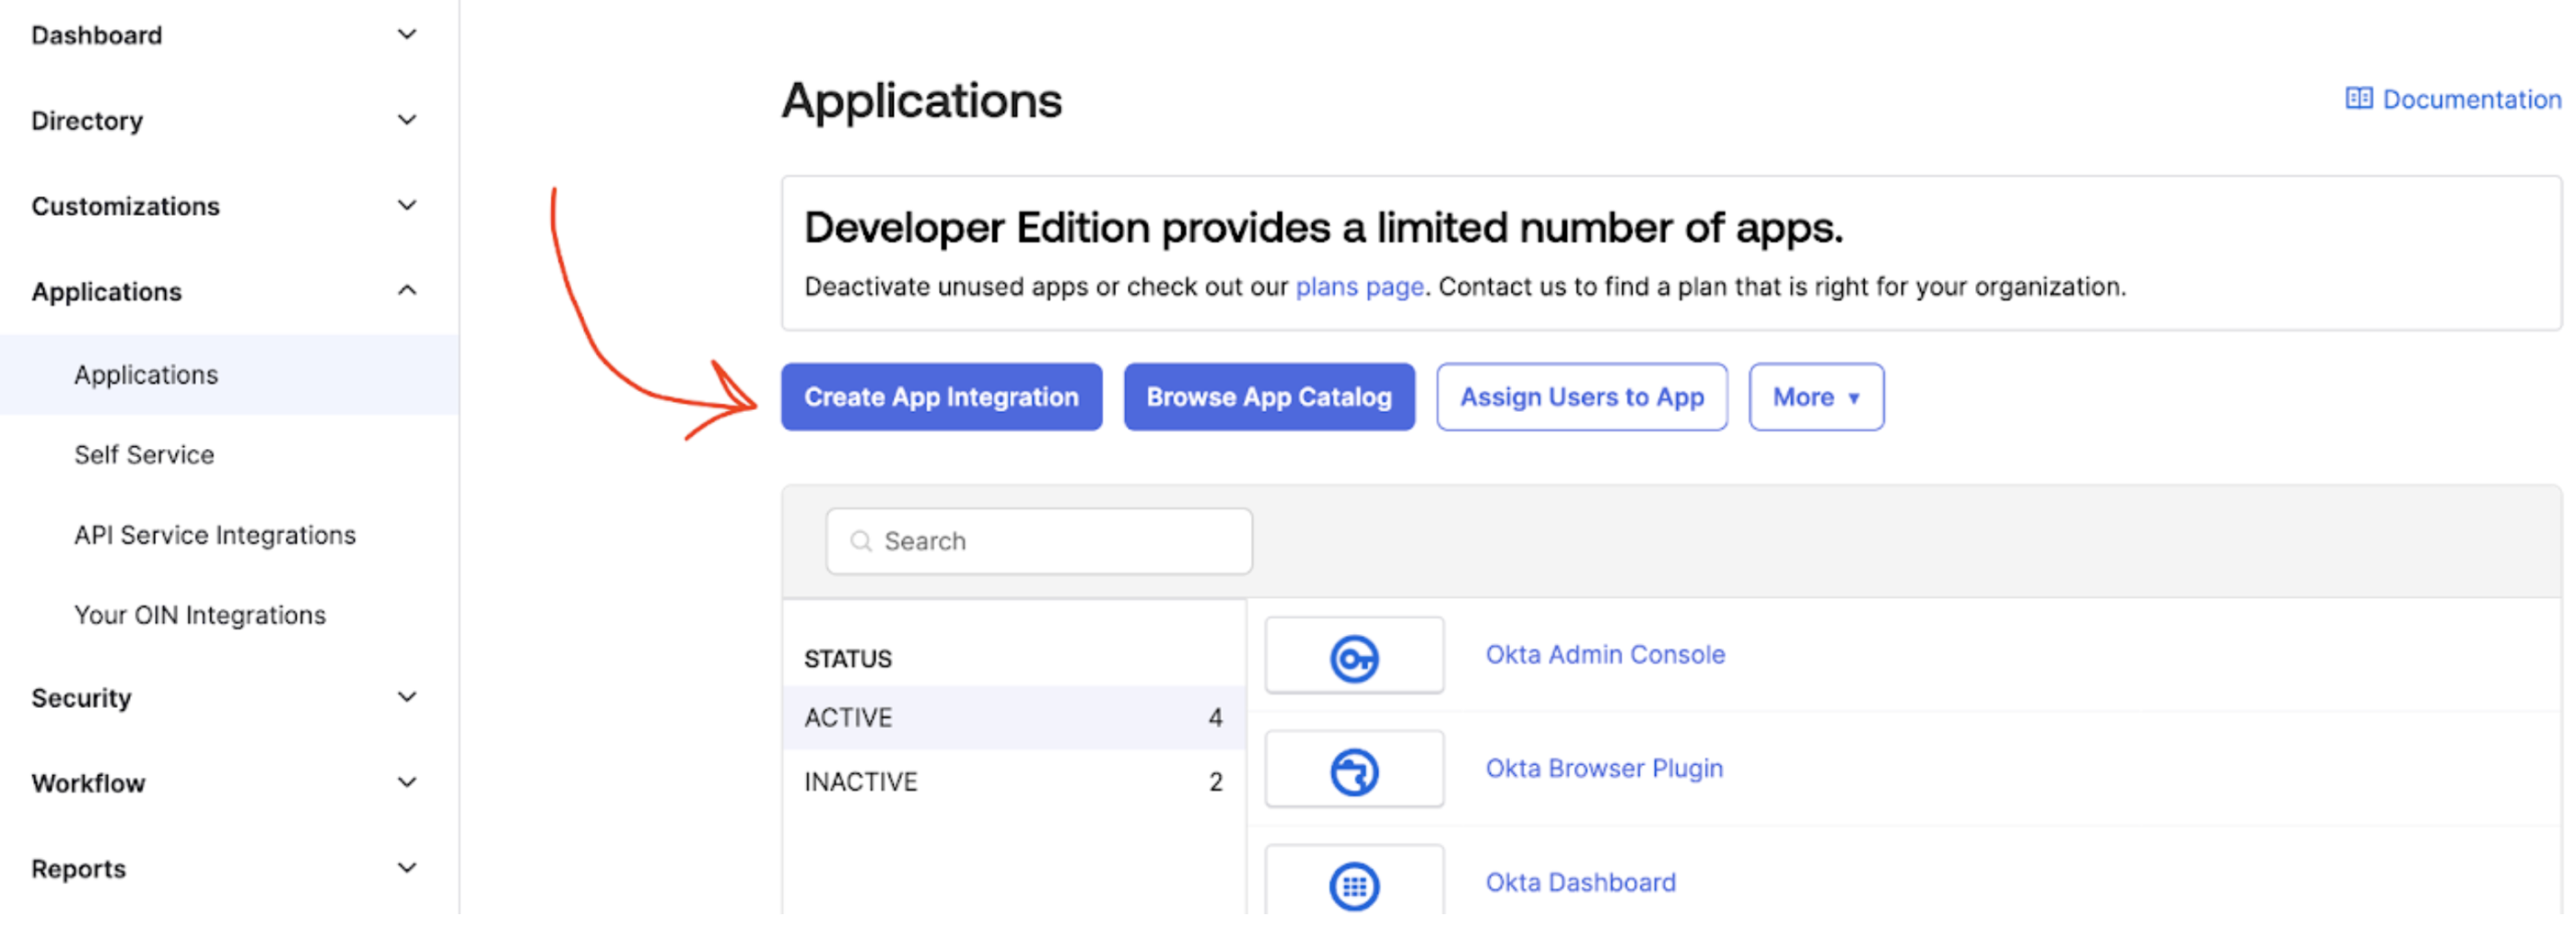
1. Create an App Integration
Navigate to the Okta Admin console, and click on “Create App Integration”
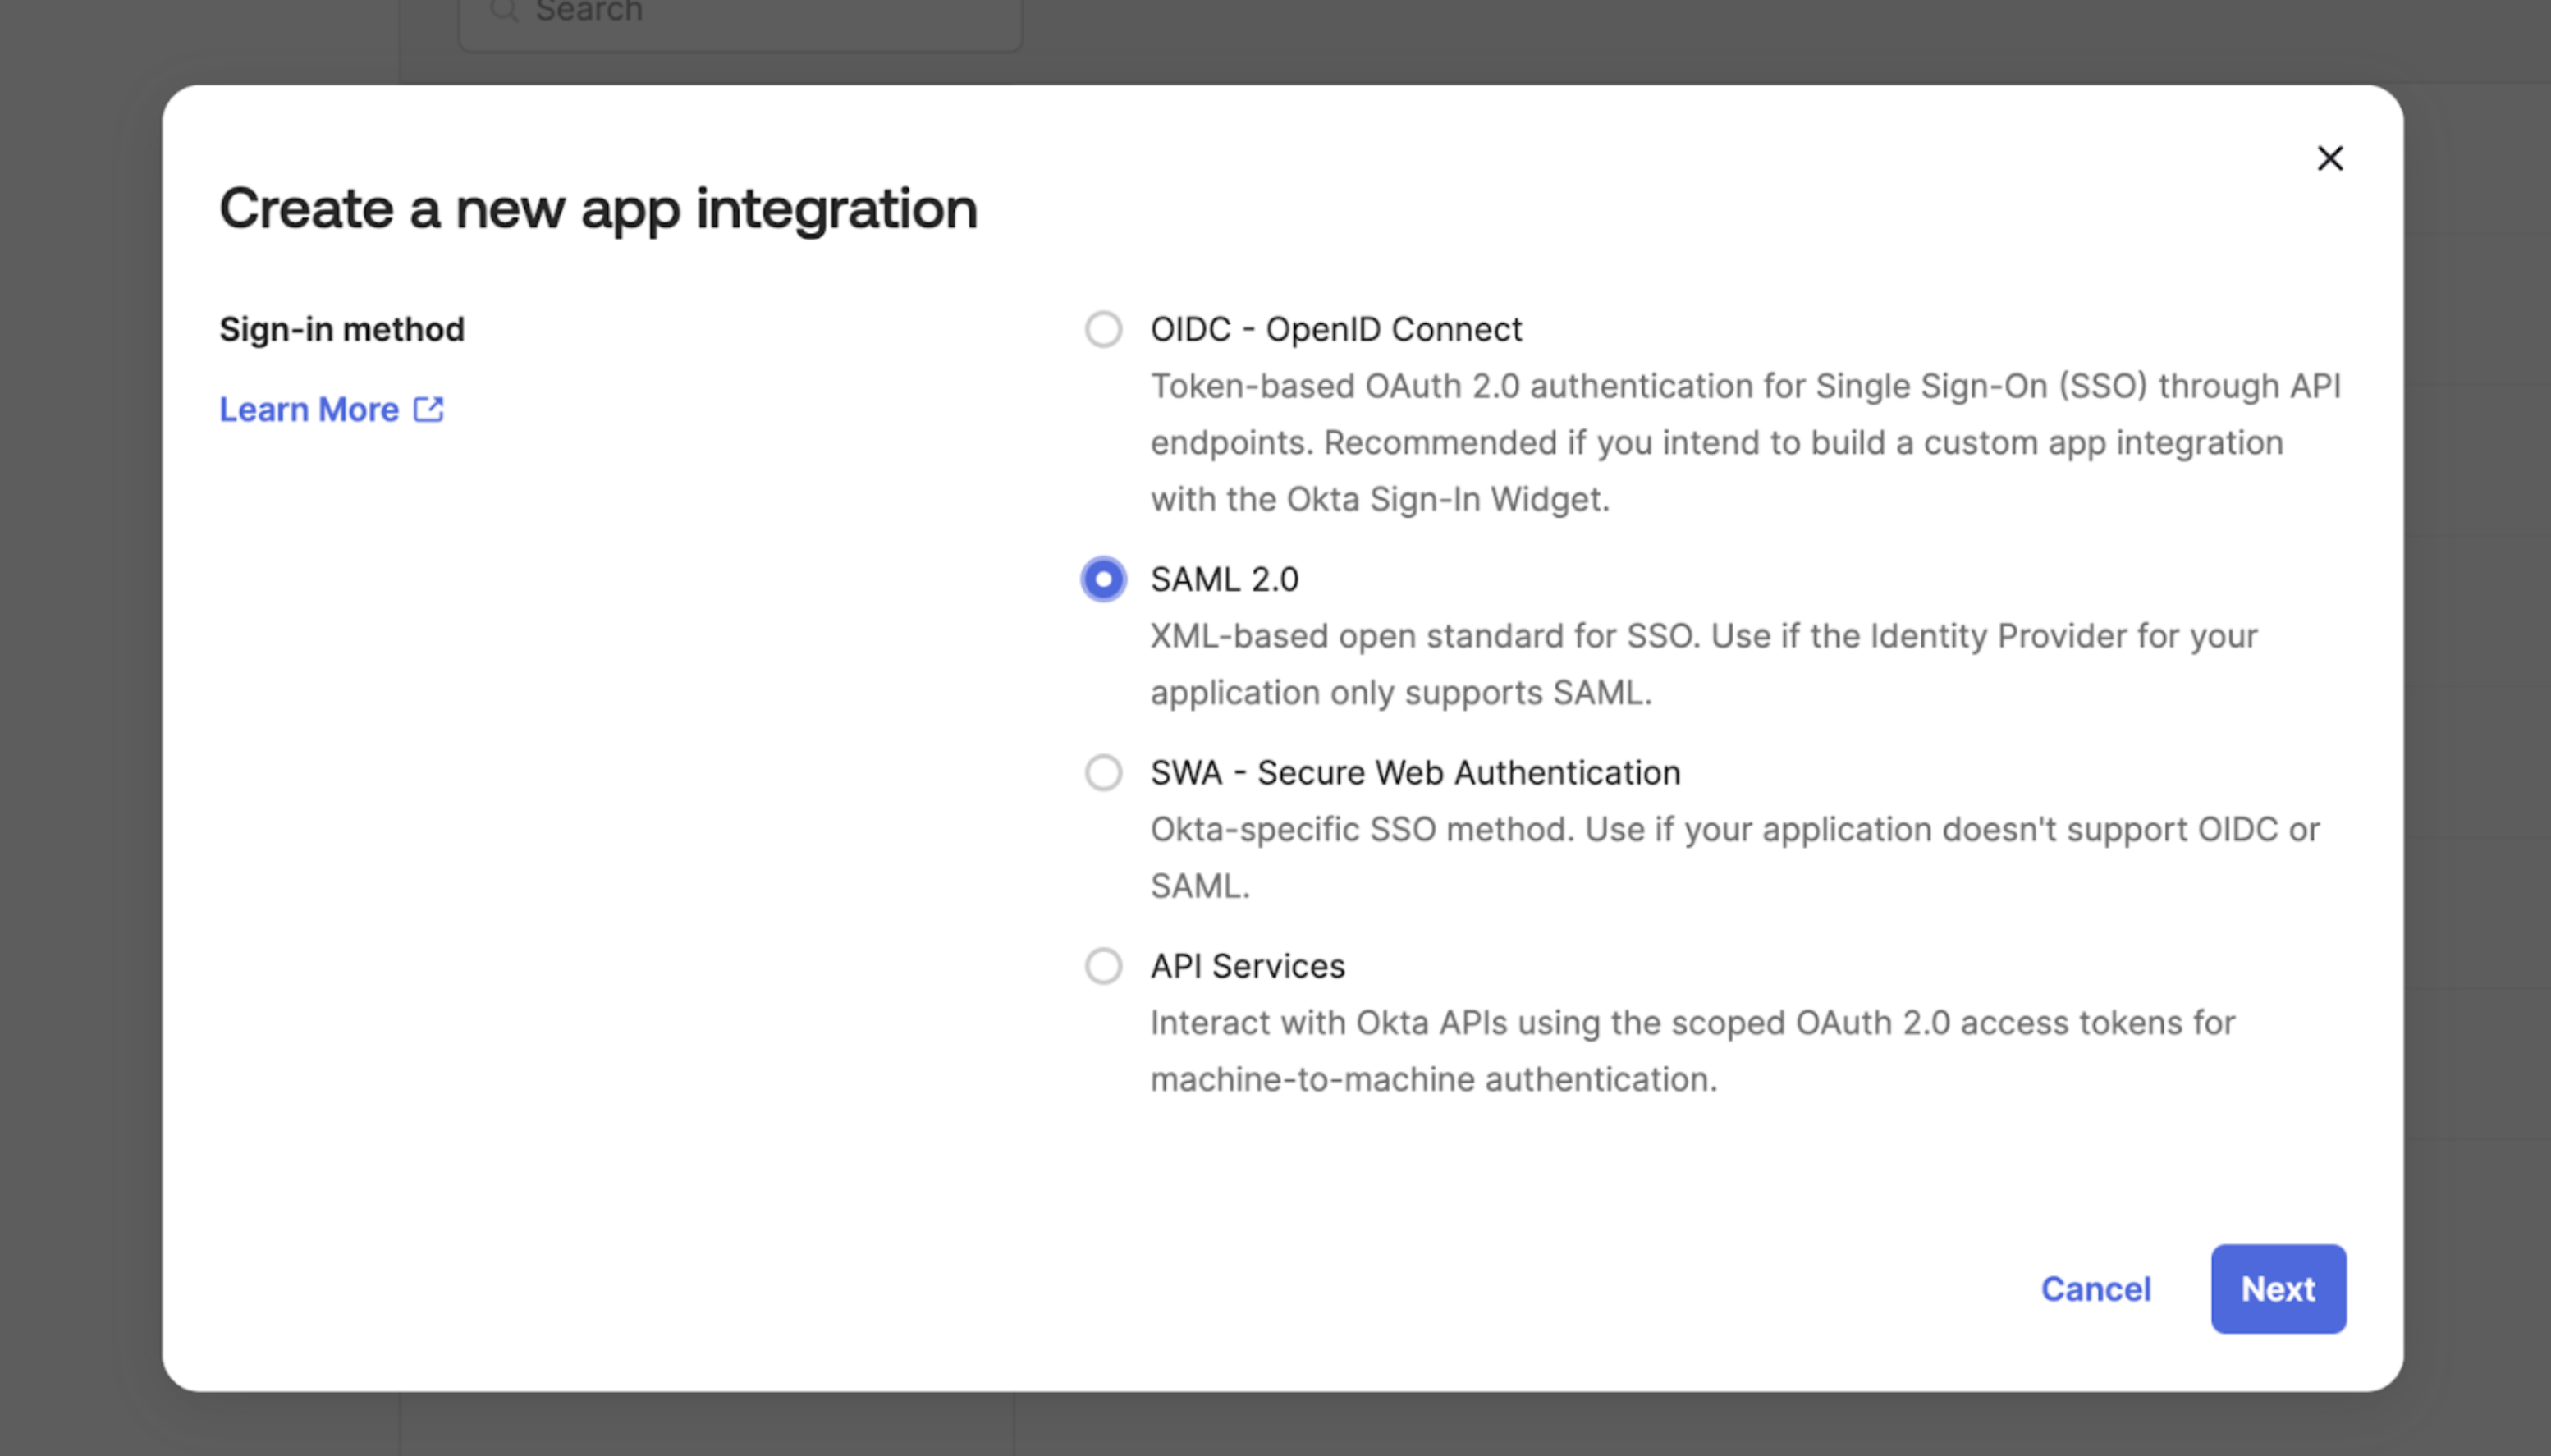
2. Choose SAML 2.0
From the list of options in the popup, select “SAML 2.0”
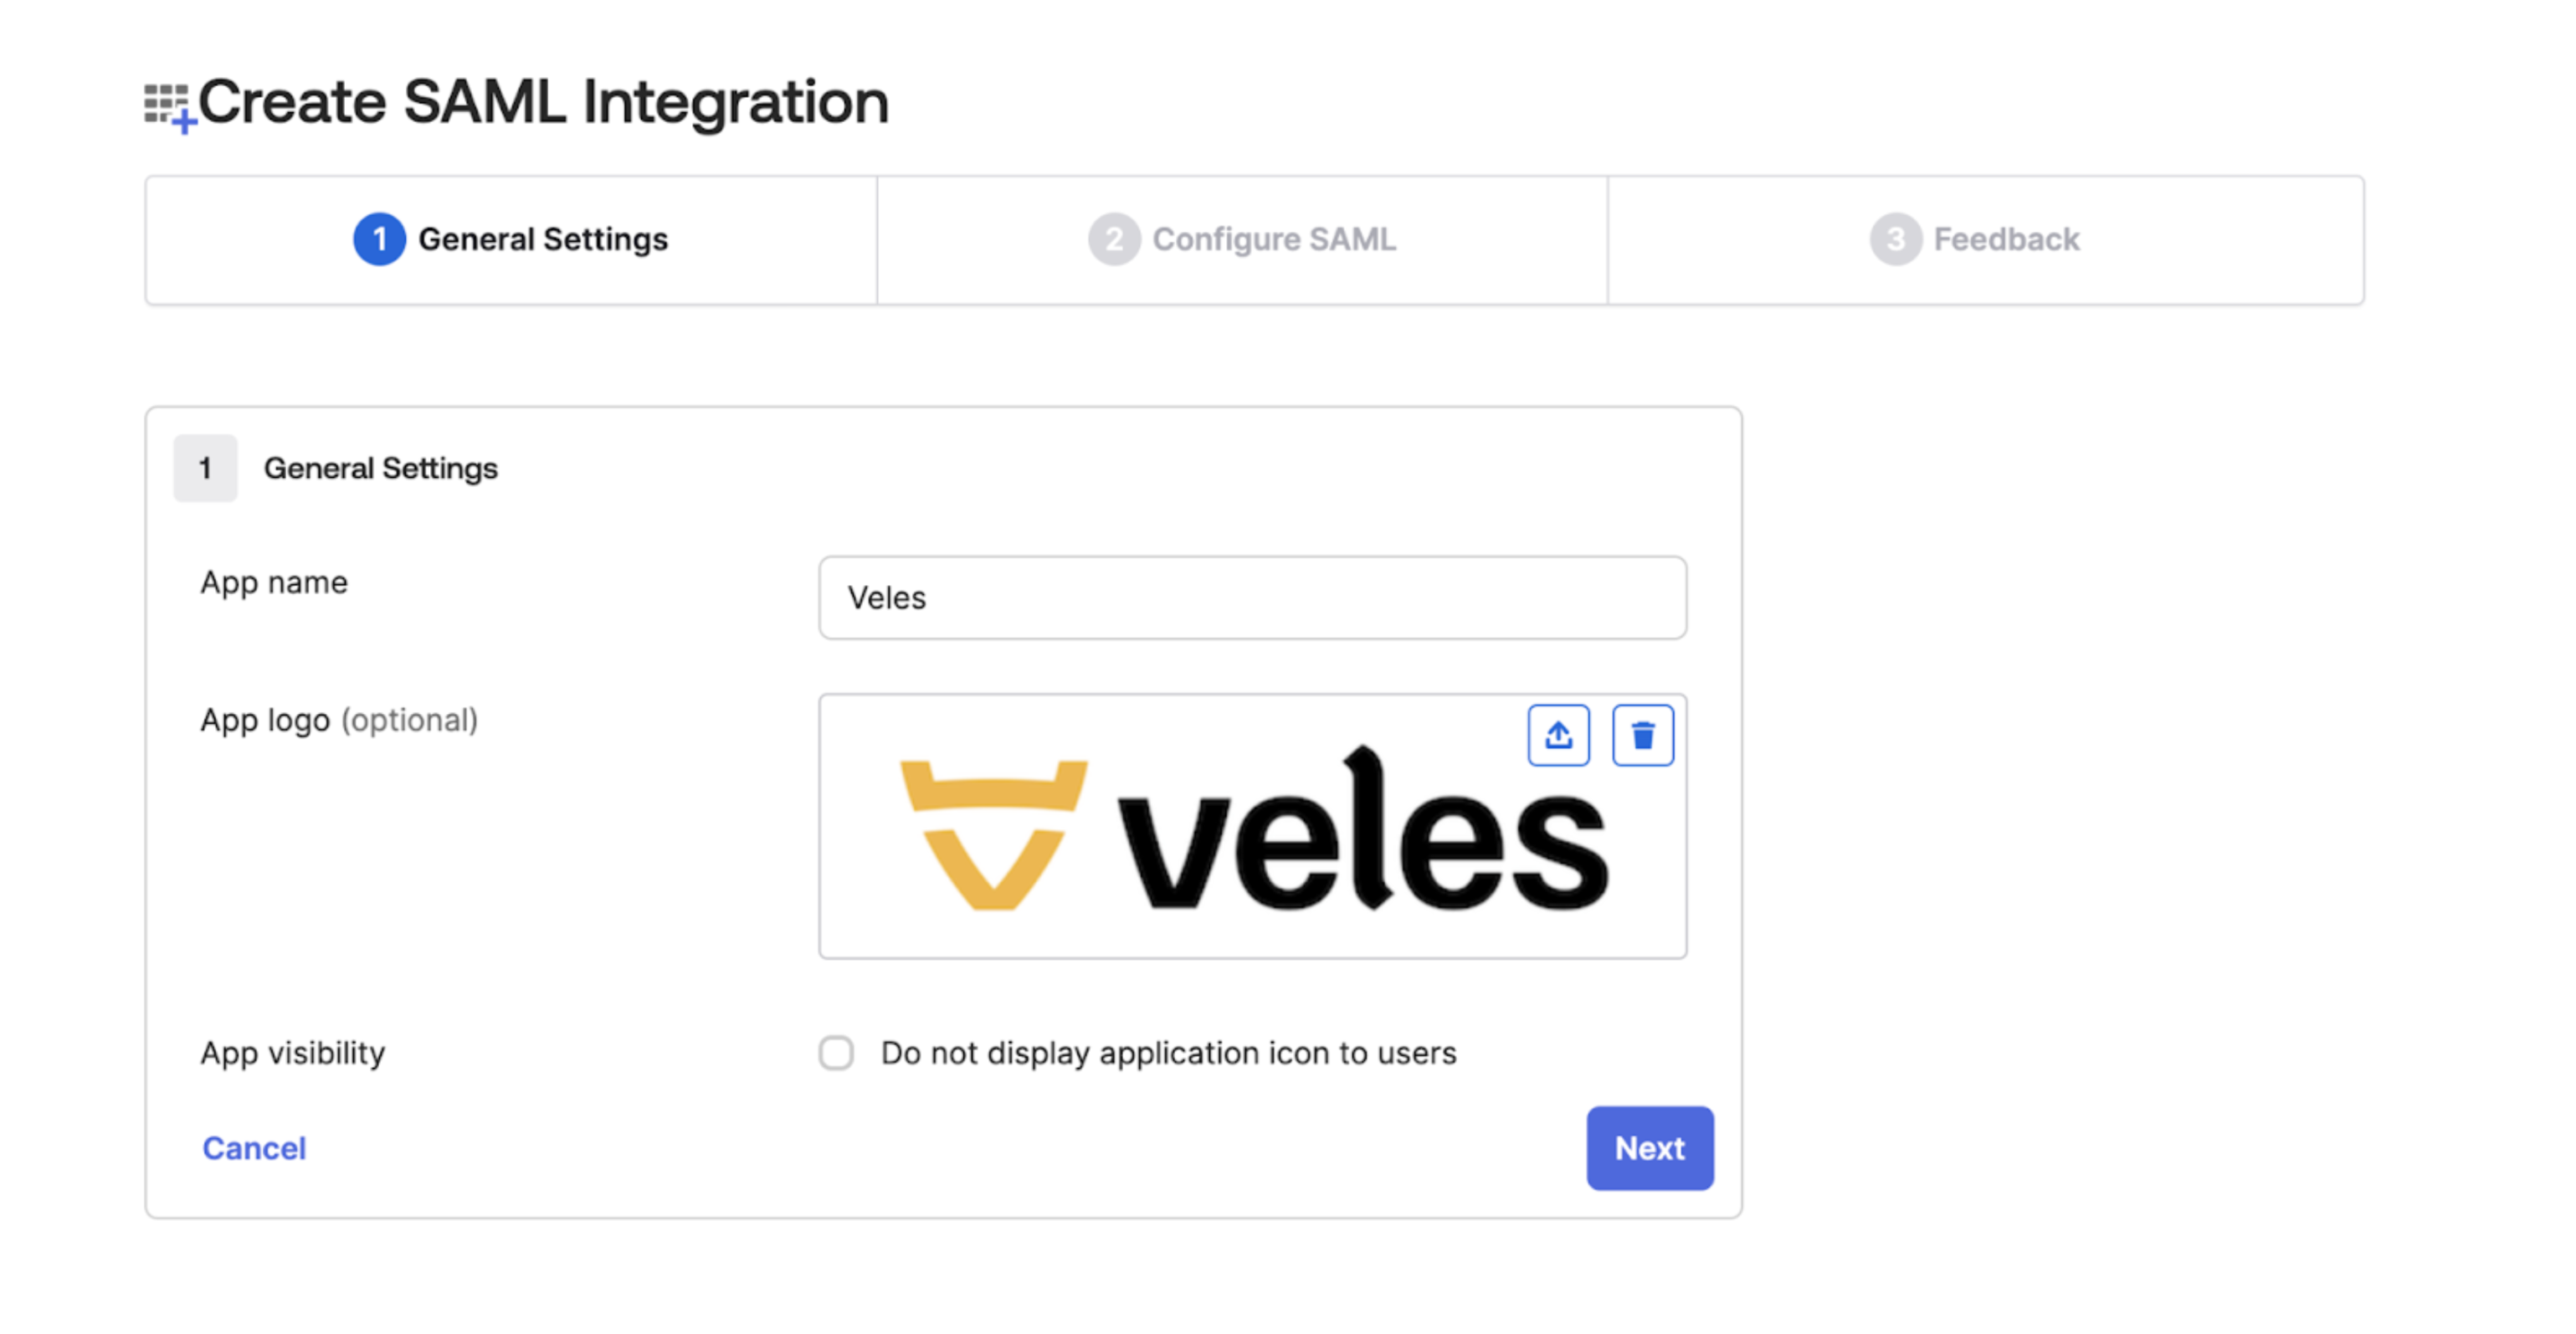
3. Fill in with Veles Information
For the application name, put in “Veles”. A suitable logo can be found here at this URL.
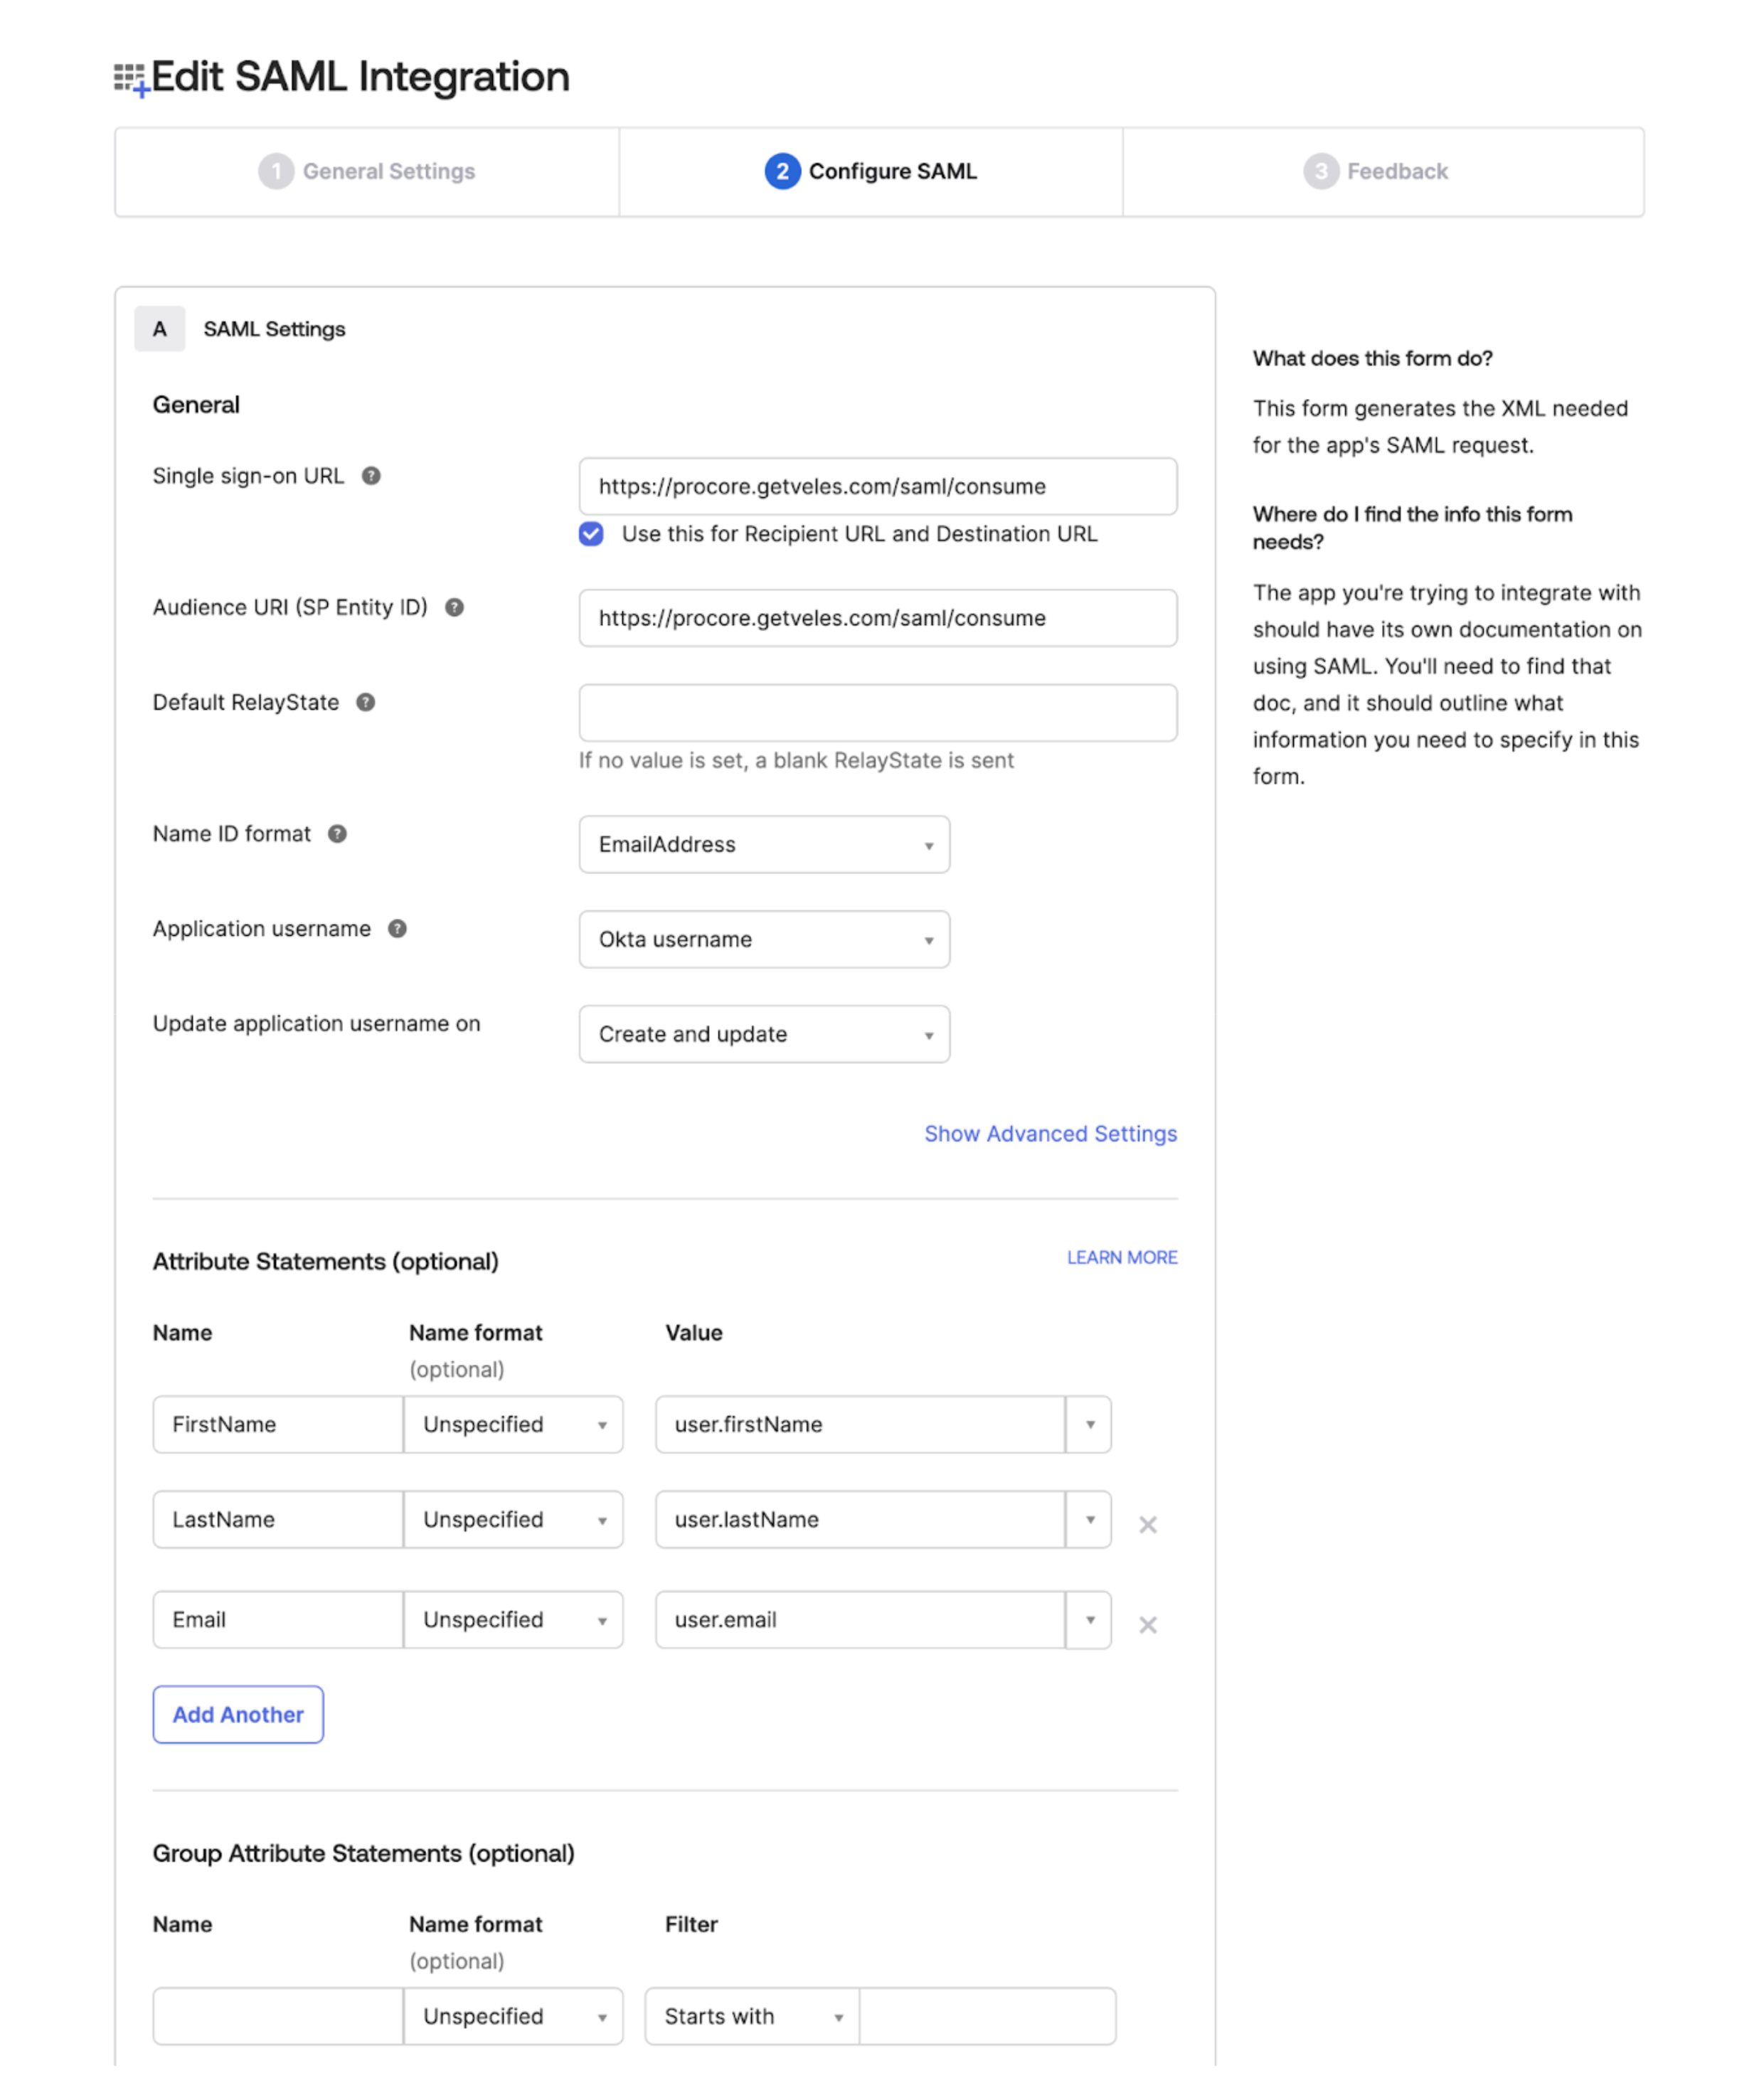
4. Configure SAML
Fill in the following fields:
Single Sign-on URL
https://app.getveles.com/saml/consume
Audience URI (SP Entity ID)
https://app.getveles.com/saml/consume
Name ID Format
Email Address
Application username
Okta Username
Update application username on:
Create and update
Under attribute statements, add these
Name |
5. Finish App Creation
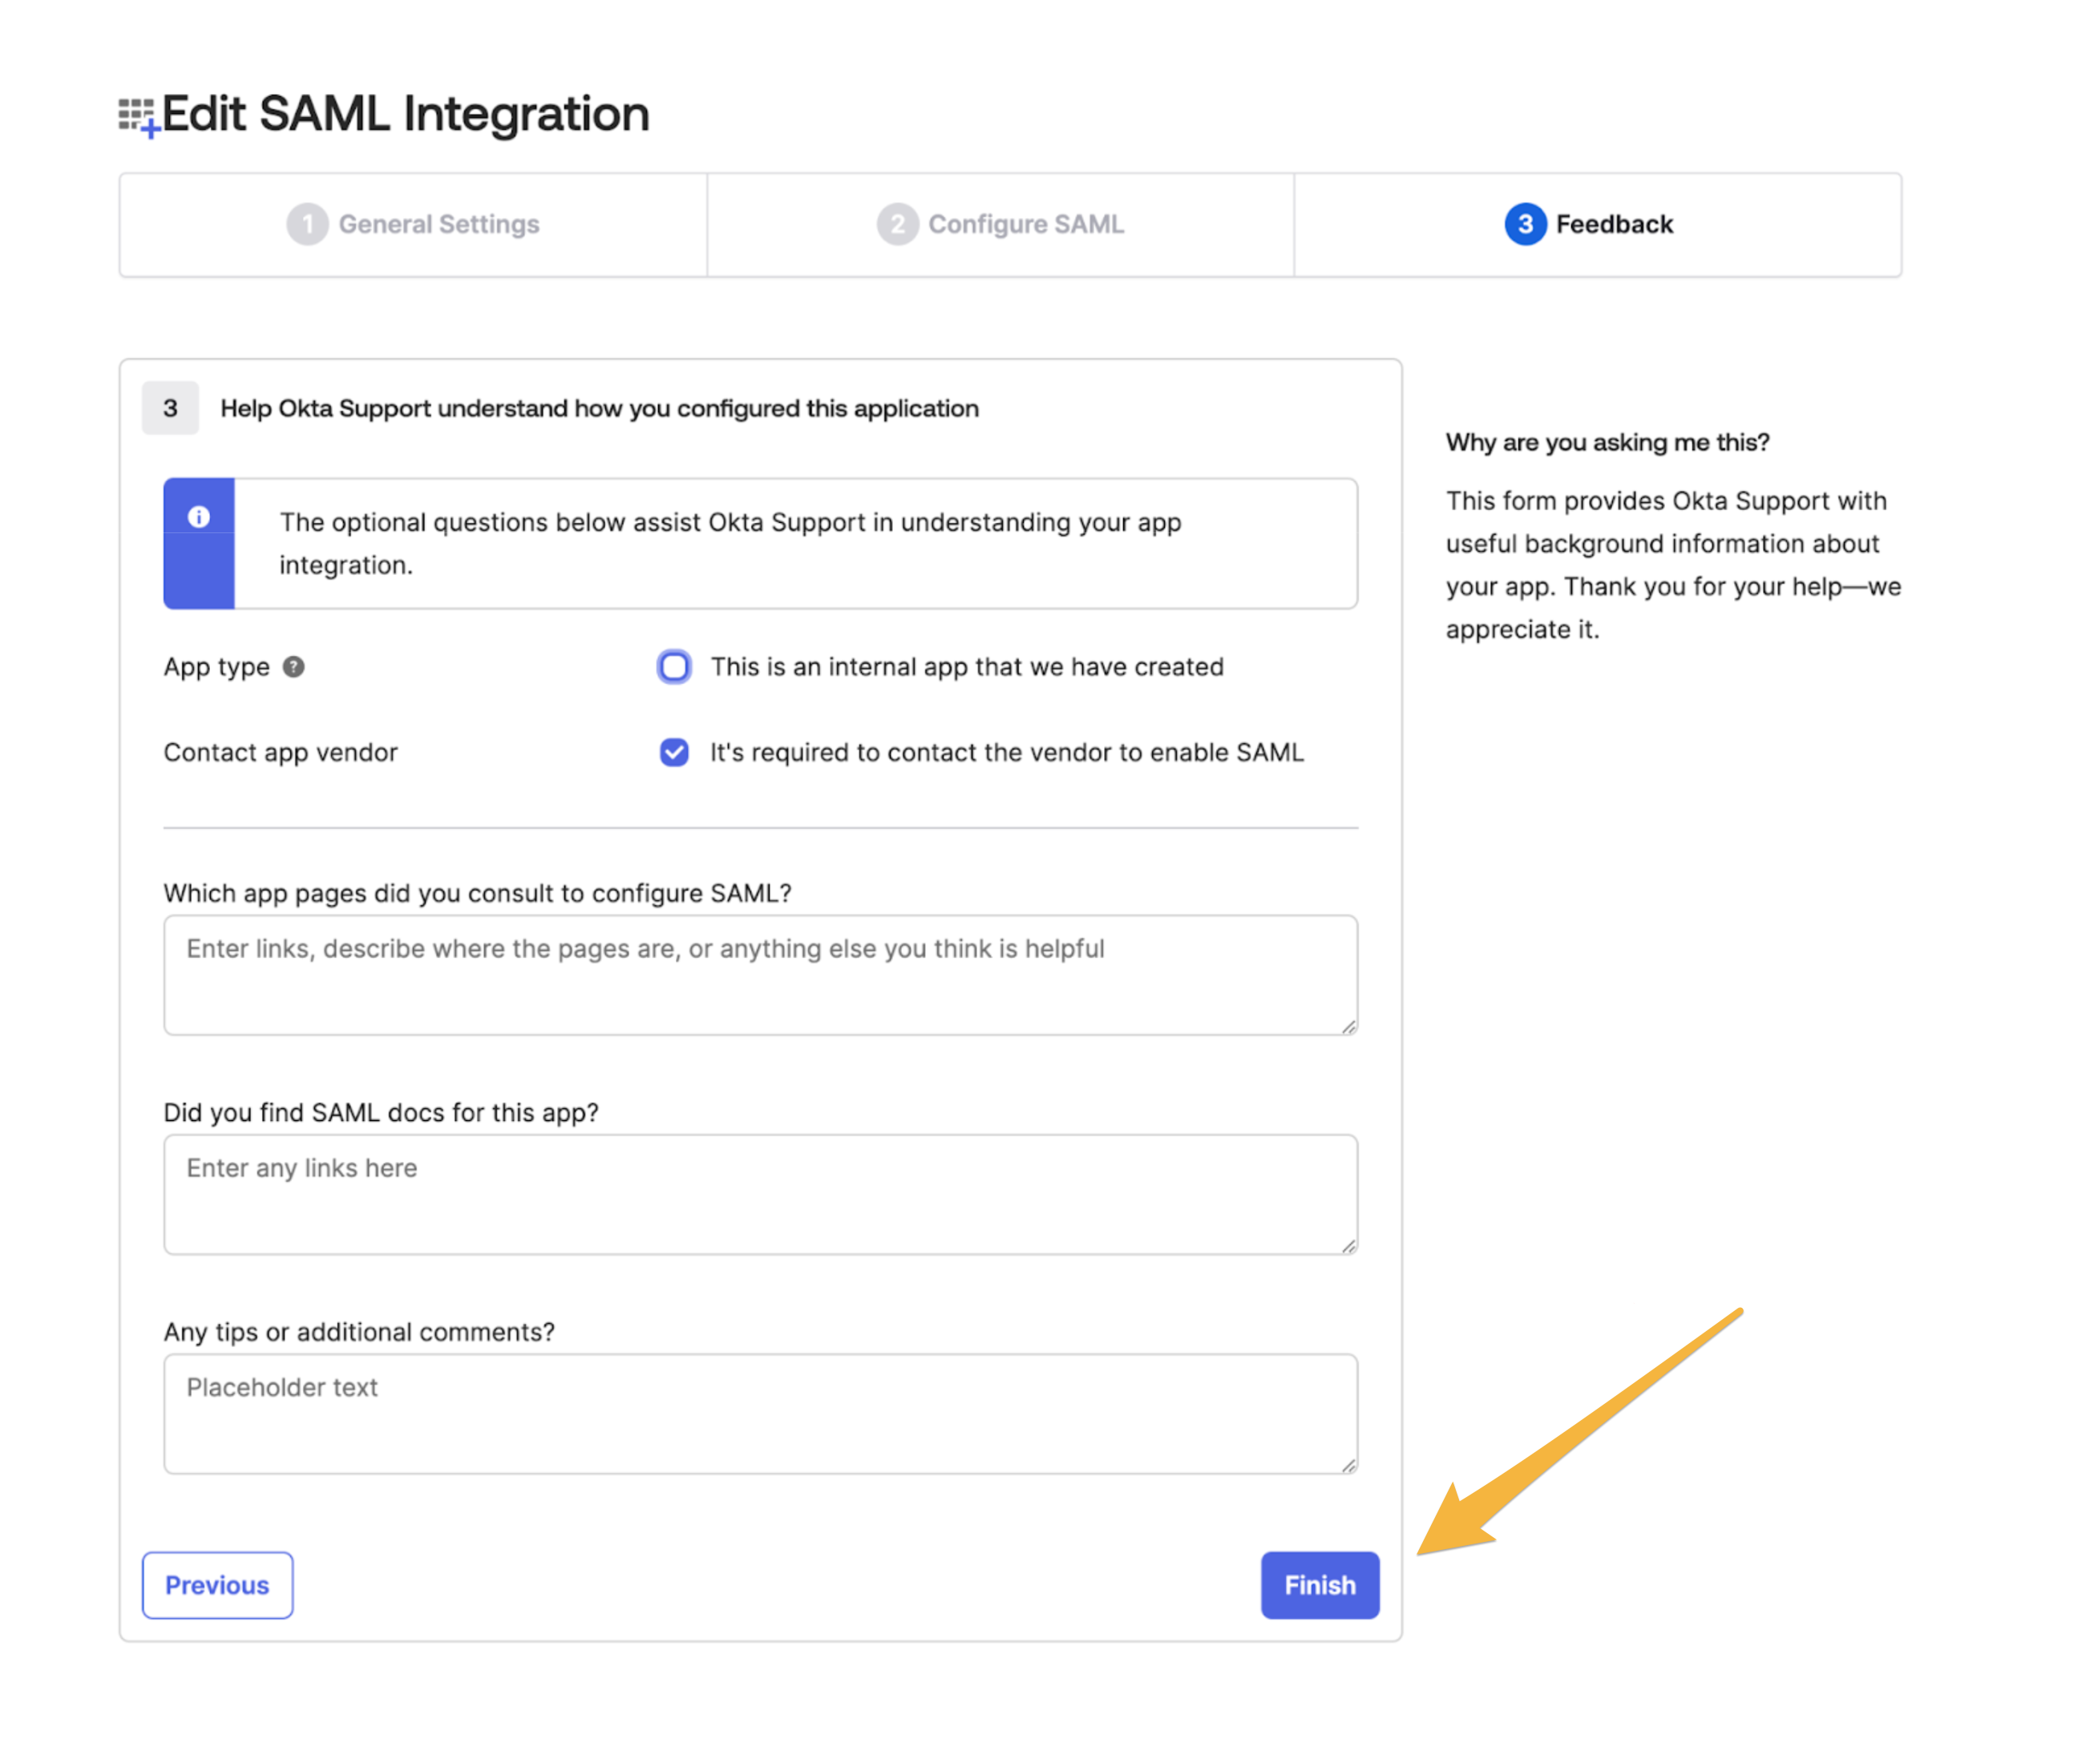
Skip the optional questions and press Finish at the bottom of the form
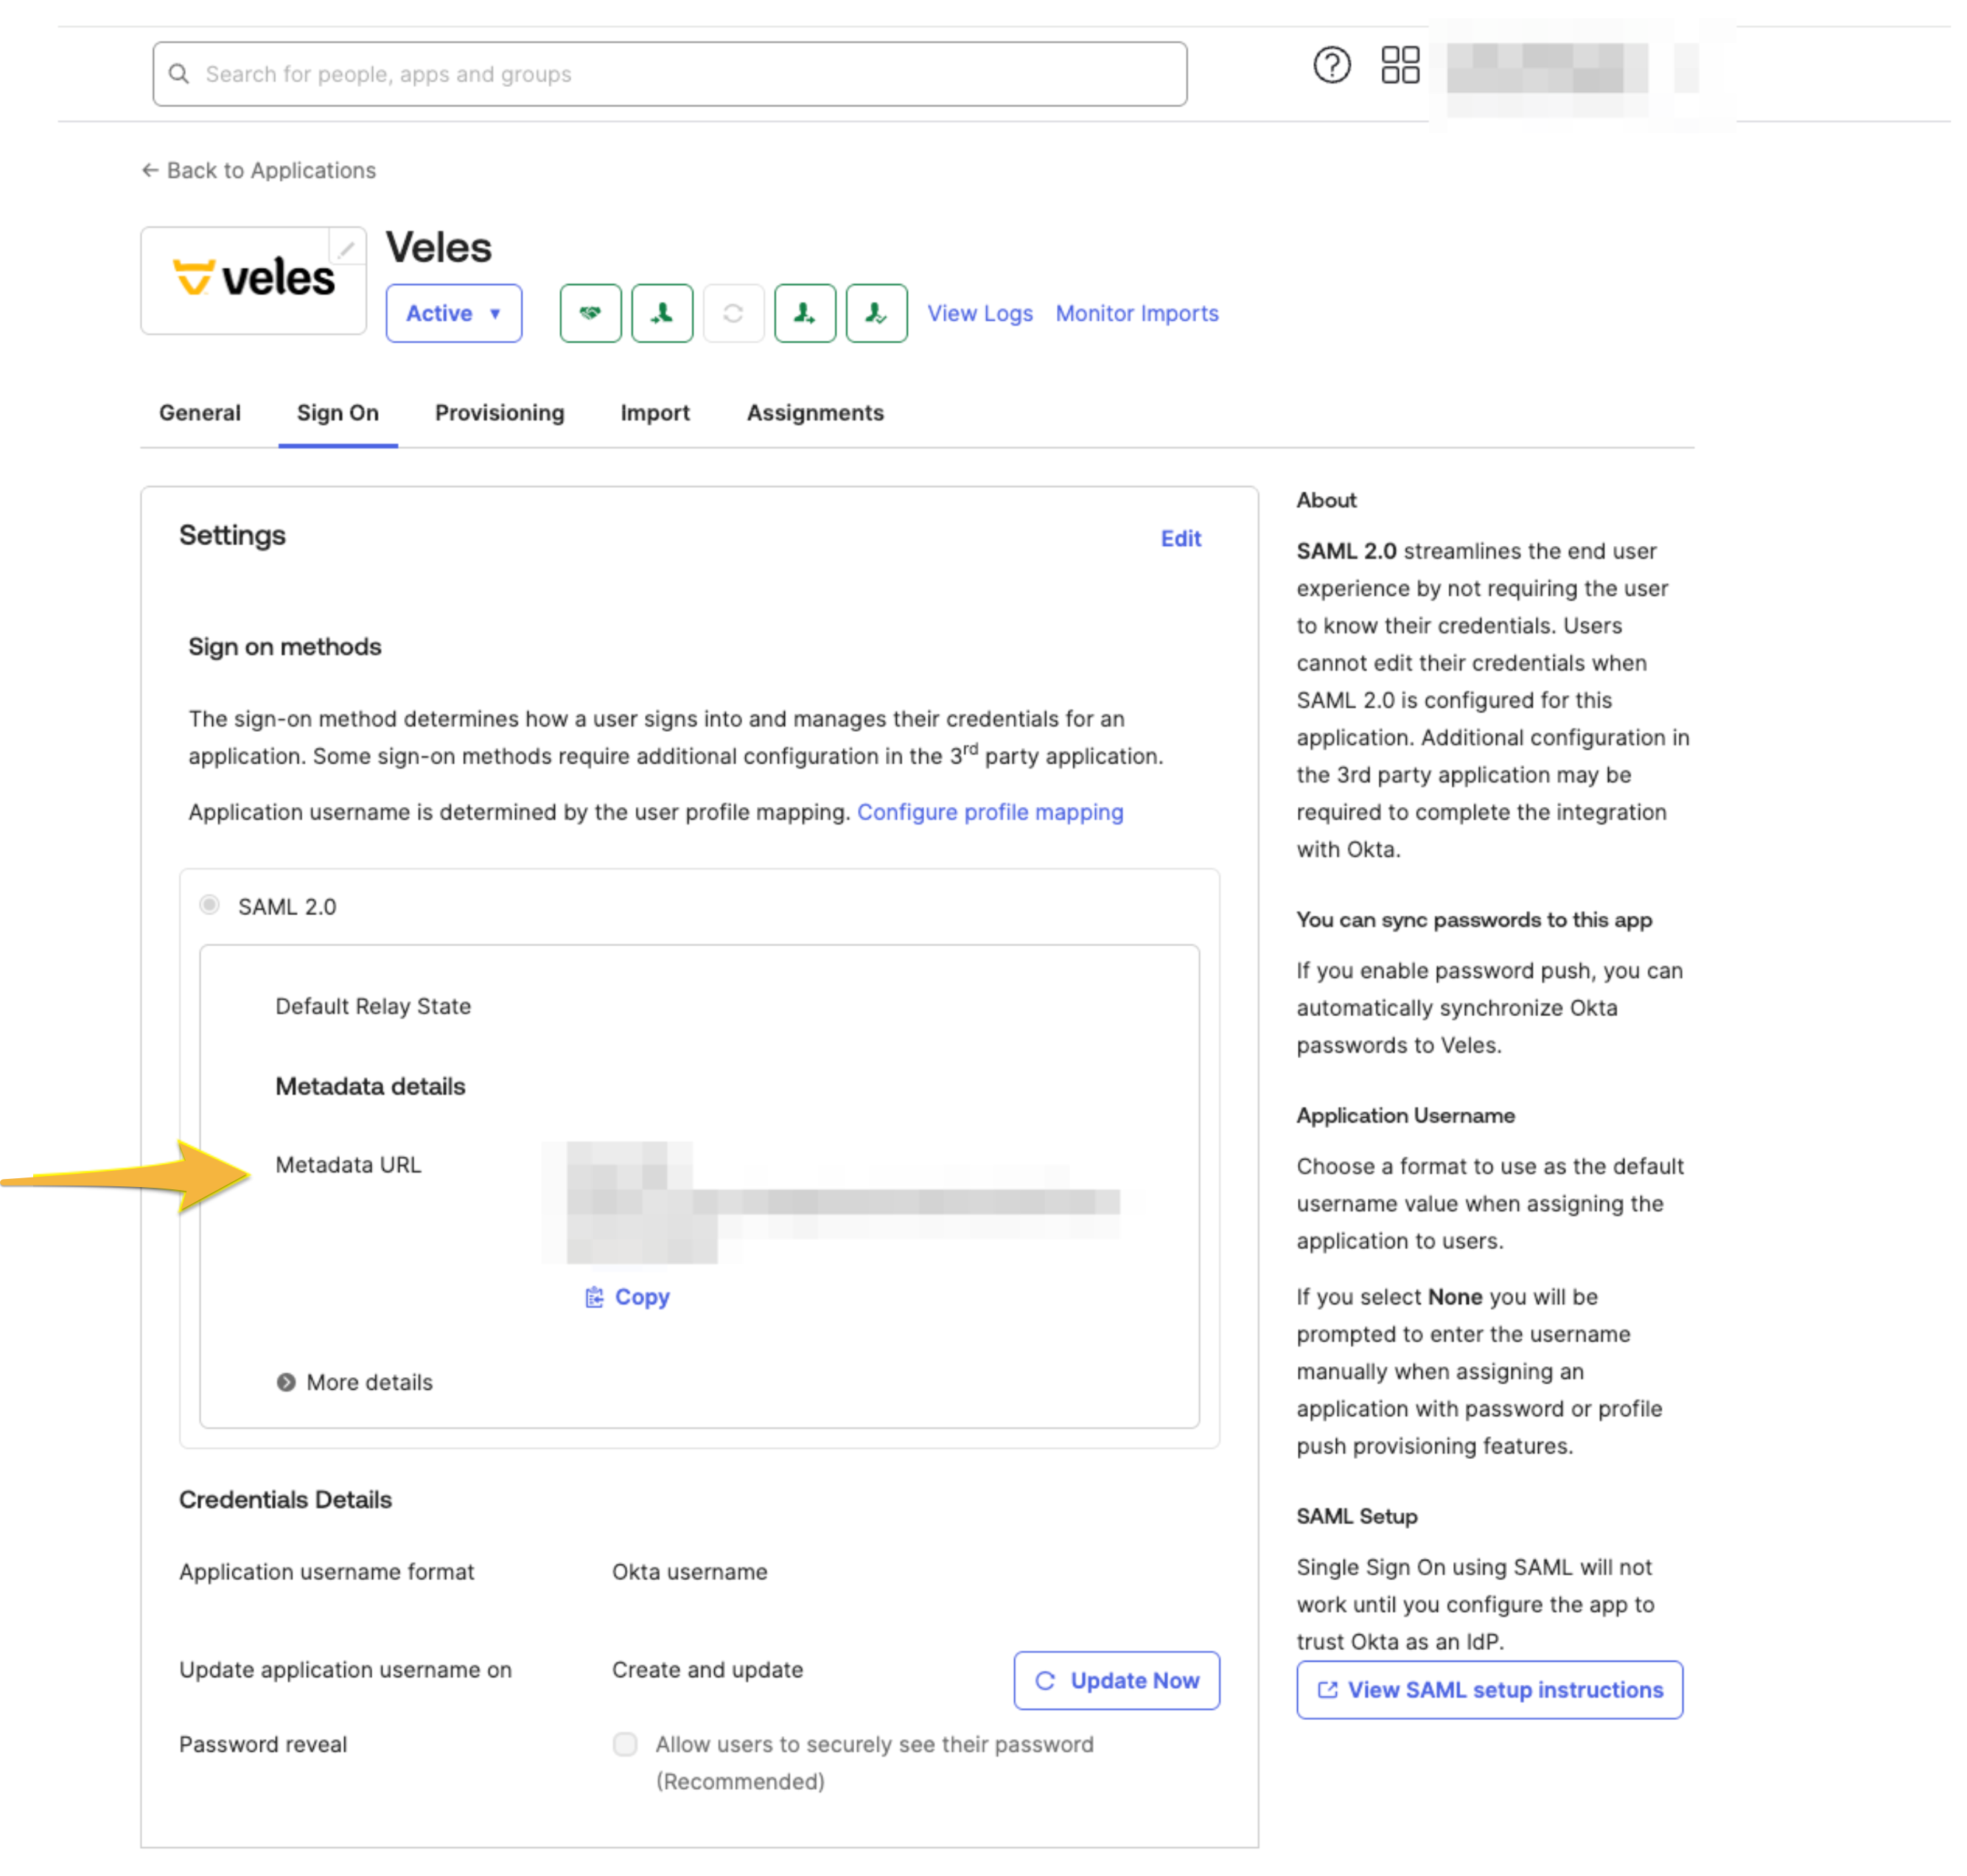
6a. Locate the MetadataURL
Navigate to the Sign On tab for your Veles App in Okta.
Copy the Metadata URL for the next step.
6b. Enable SSO in Veles
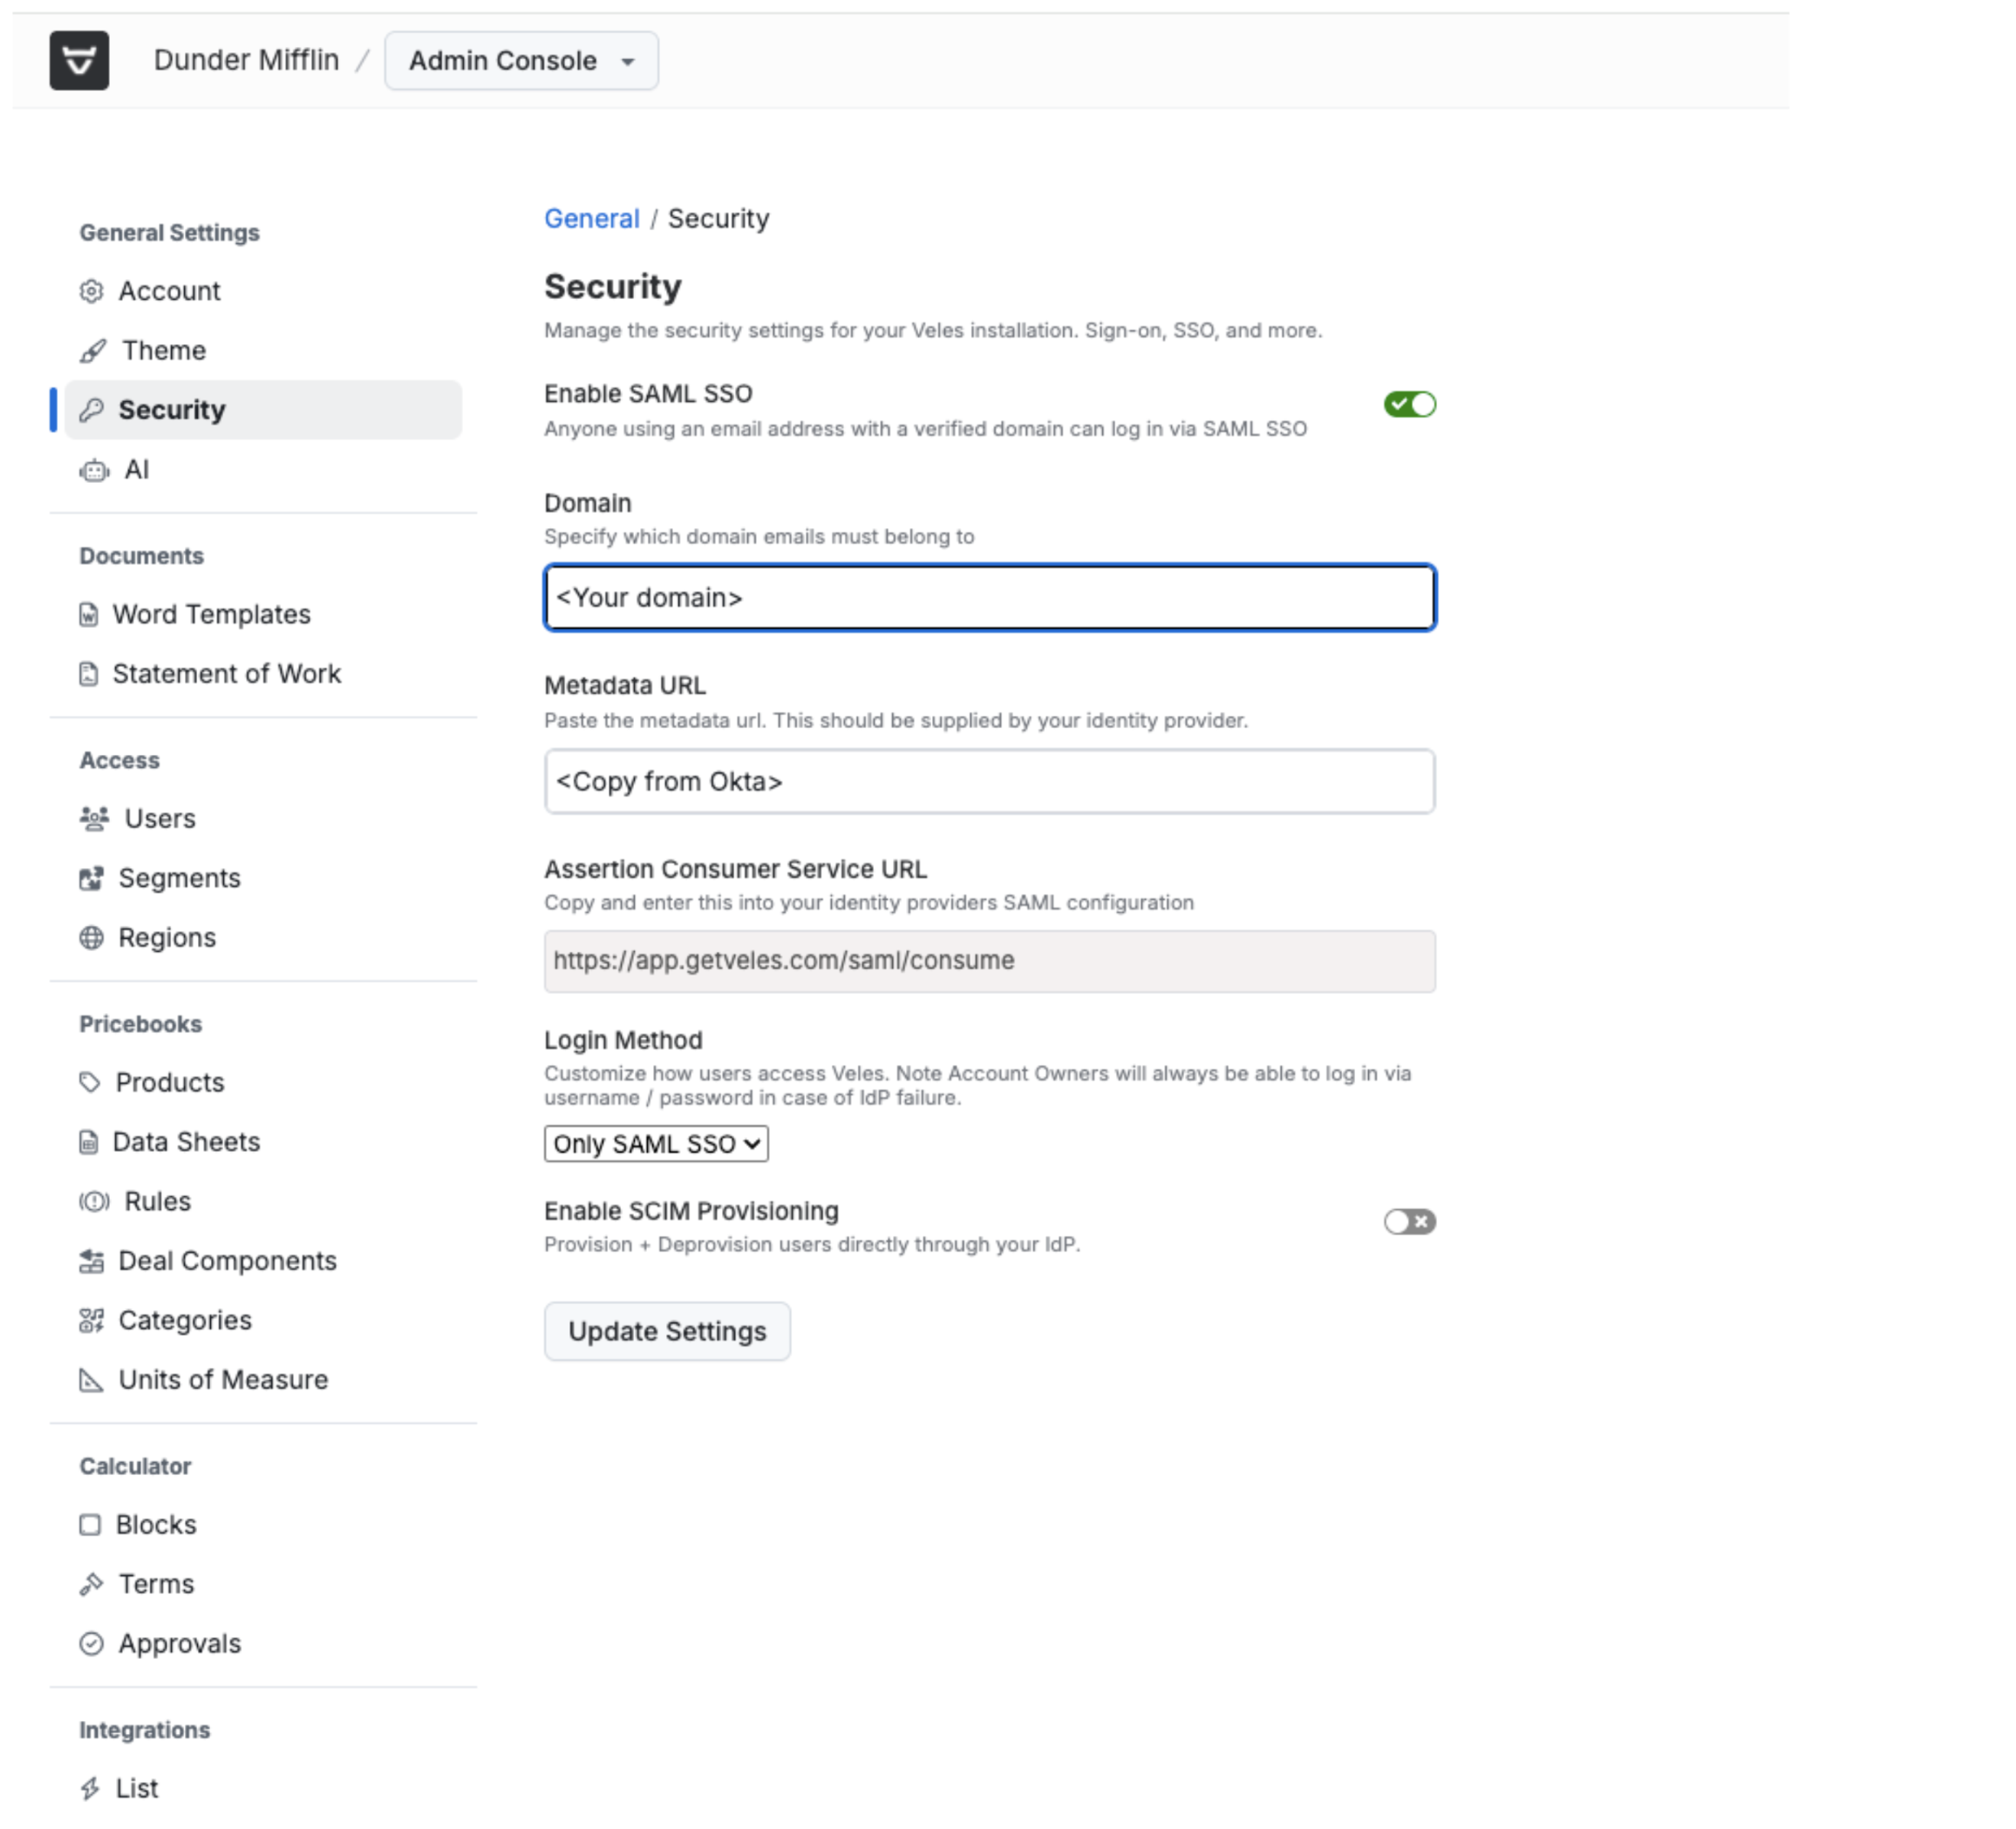
Within the Veles admin section, click on the “Security” tab and check the “Enable SAML SSO” checkbox.
This will bring up a form where you will need to enter the following:
Domain:
<your_domain>.com
Metadata URL:
Plug in the MetadataURL from the previous step
Login Method:
Any Method
Allows users to sign in either via SSO or Username / Password.
Only SAML SSO
Disables username / password login.
Leave SCIM Provisioning off for now, will revisit in following steps. Click update.
7. Verify Sign In Flow Works
Assign yourself the Veles app and attempt to log in through Okta.
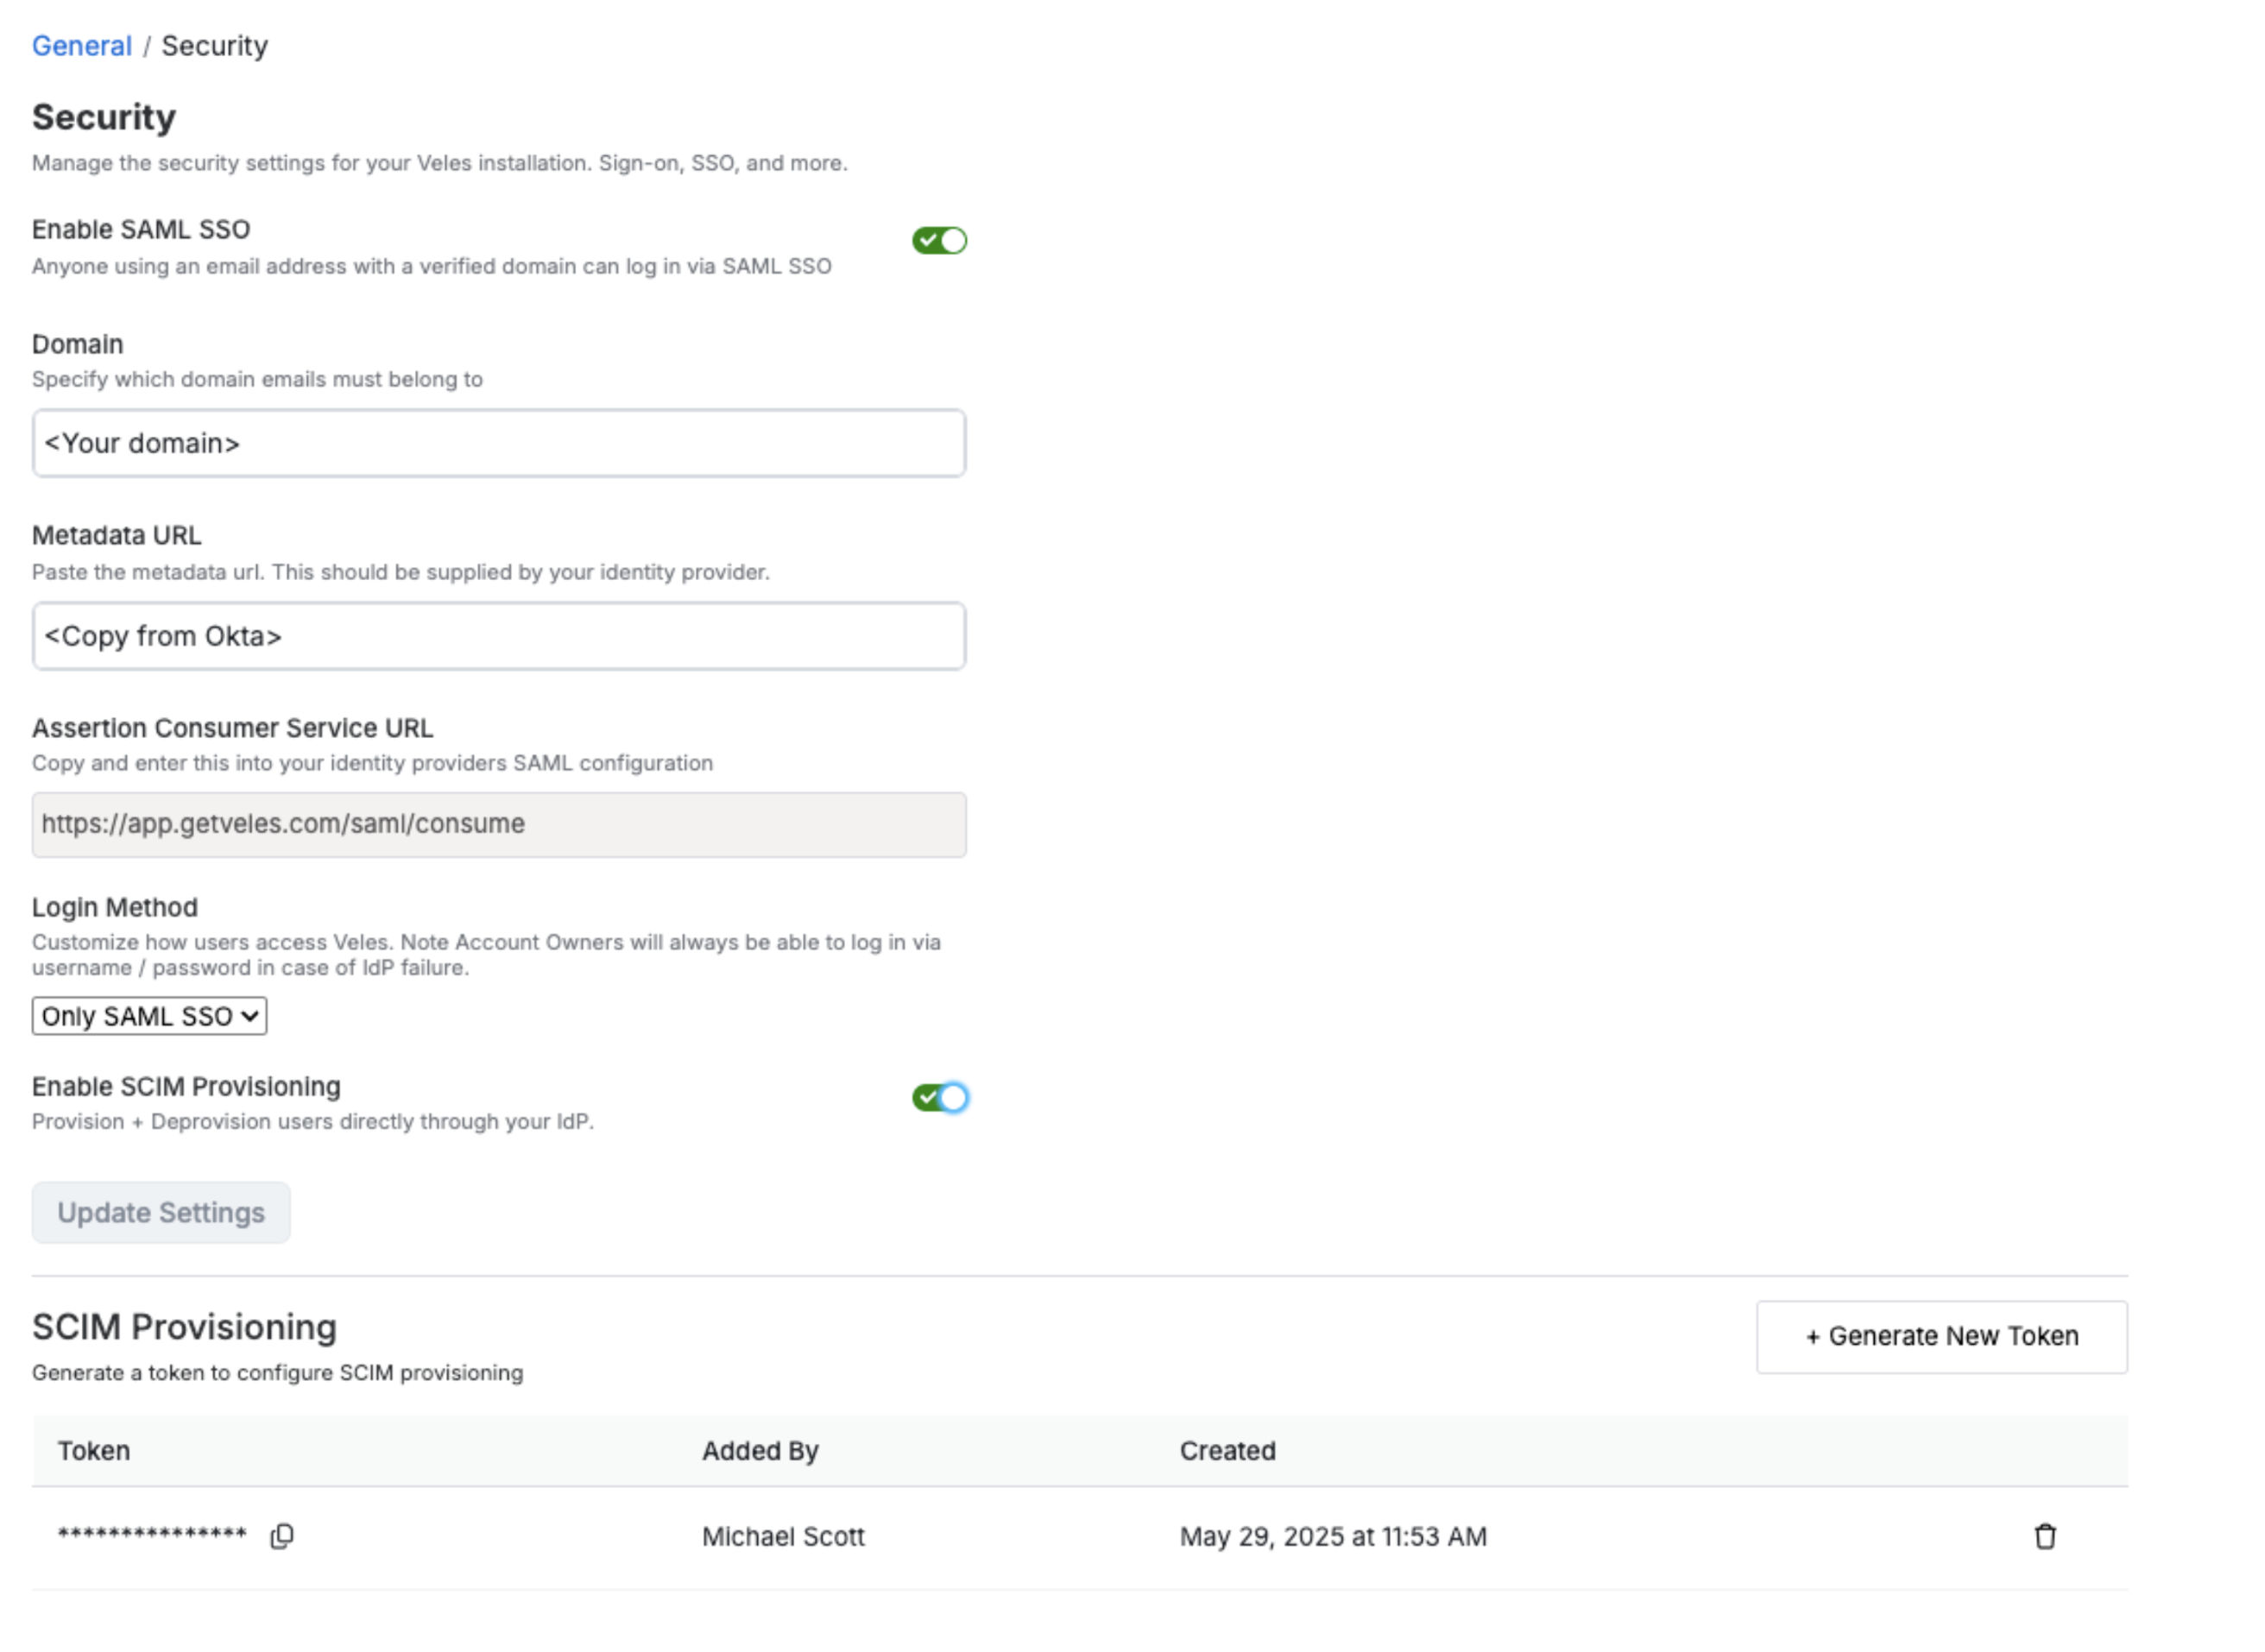
8. Setup User Provisioning in Veles
To setup automatic user provisioning and deprovisioning through Okta, return back to the Security section in Veles admin and click on “Enable SCIM Provisioning”
A new table will come into view at the bottom of the screen. Click the button to “Generate New Token”. These will create a new token which we will give to Okta to use for authentication purposes when the two services communicate.
9. Enable Provisioning in Okta
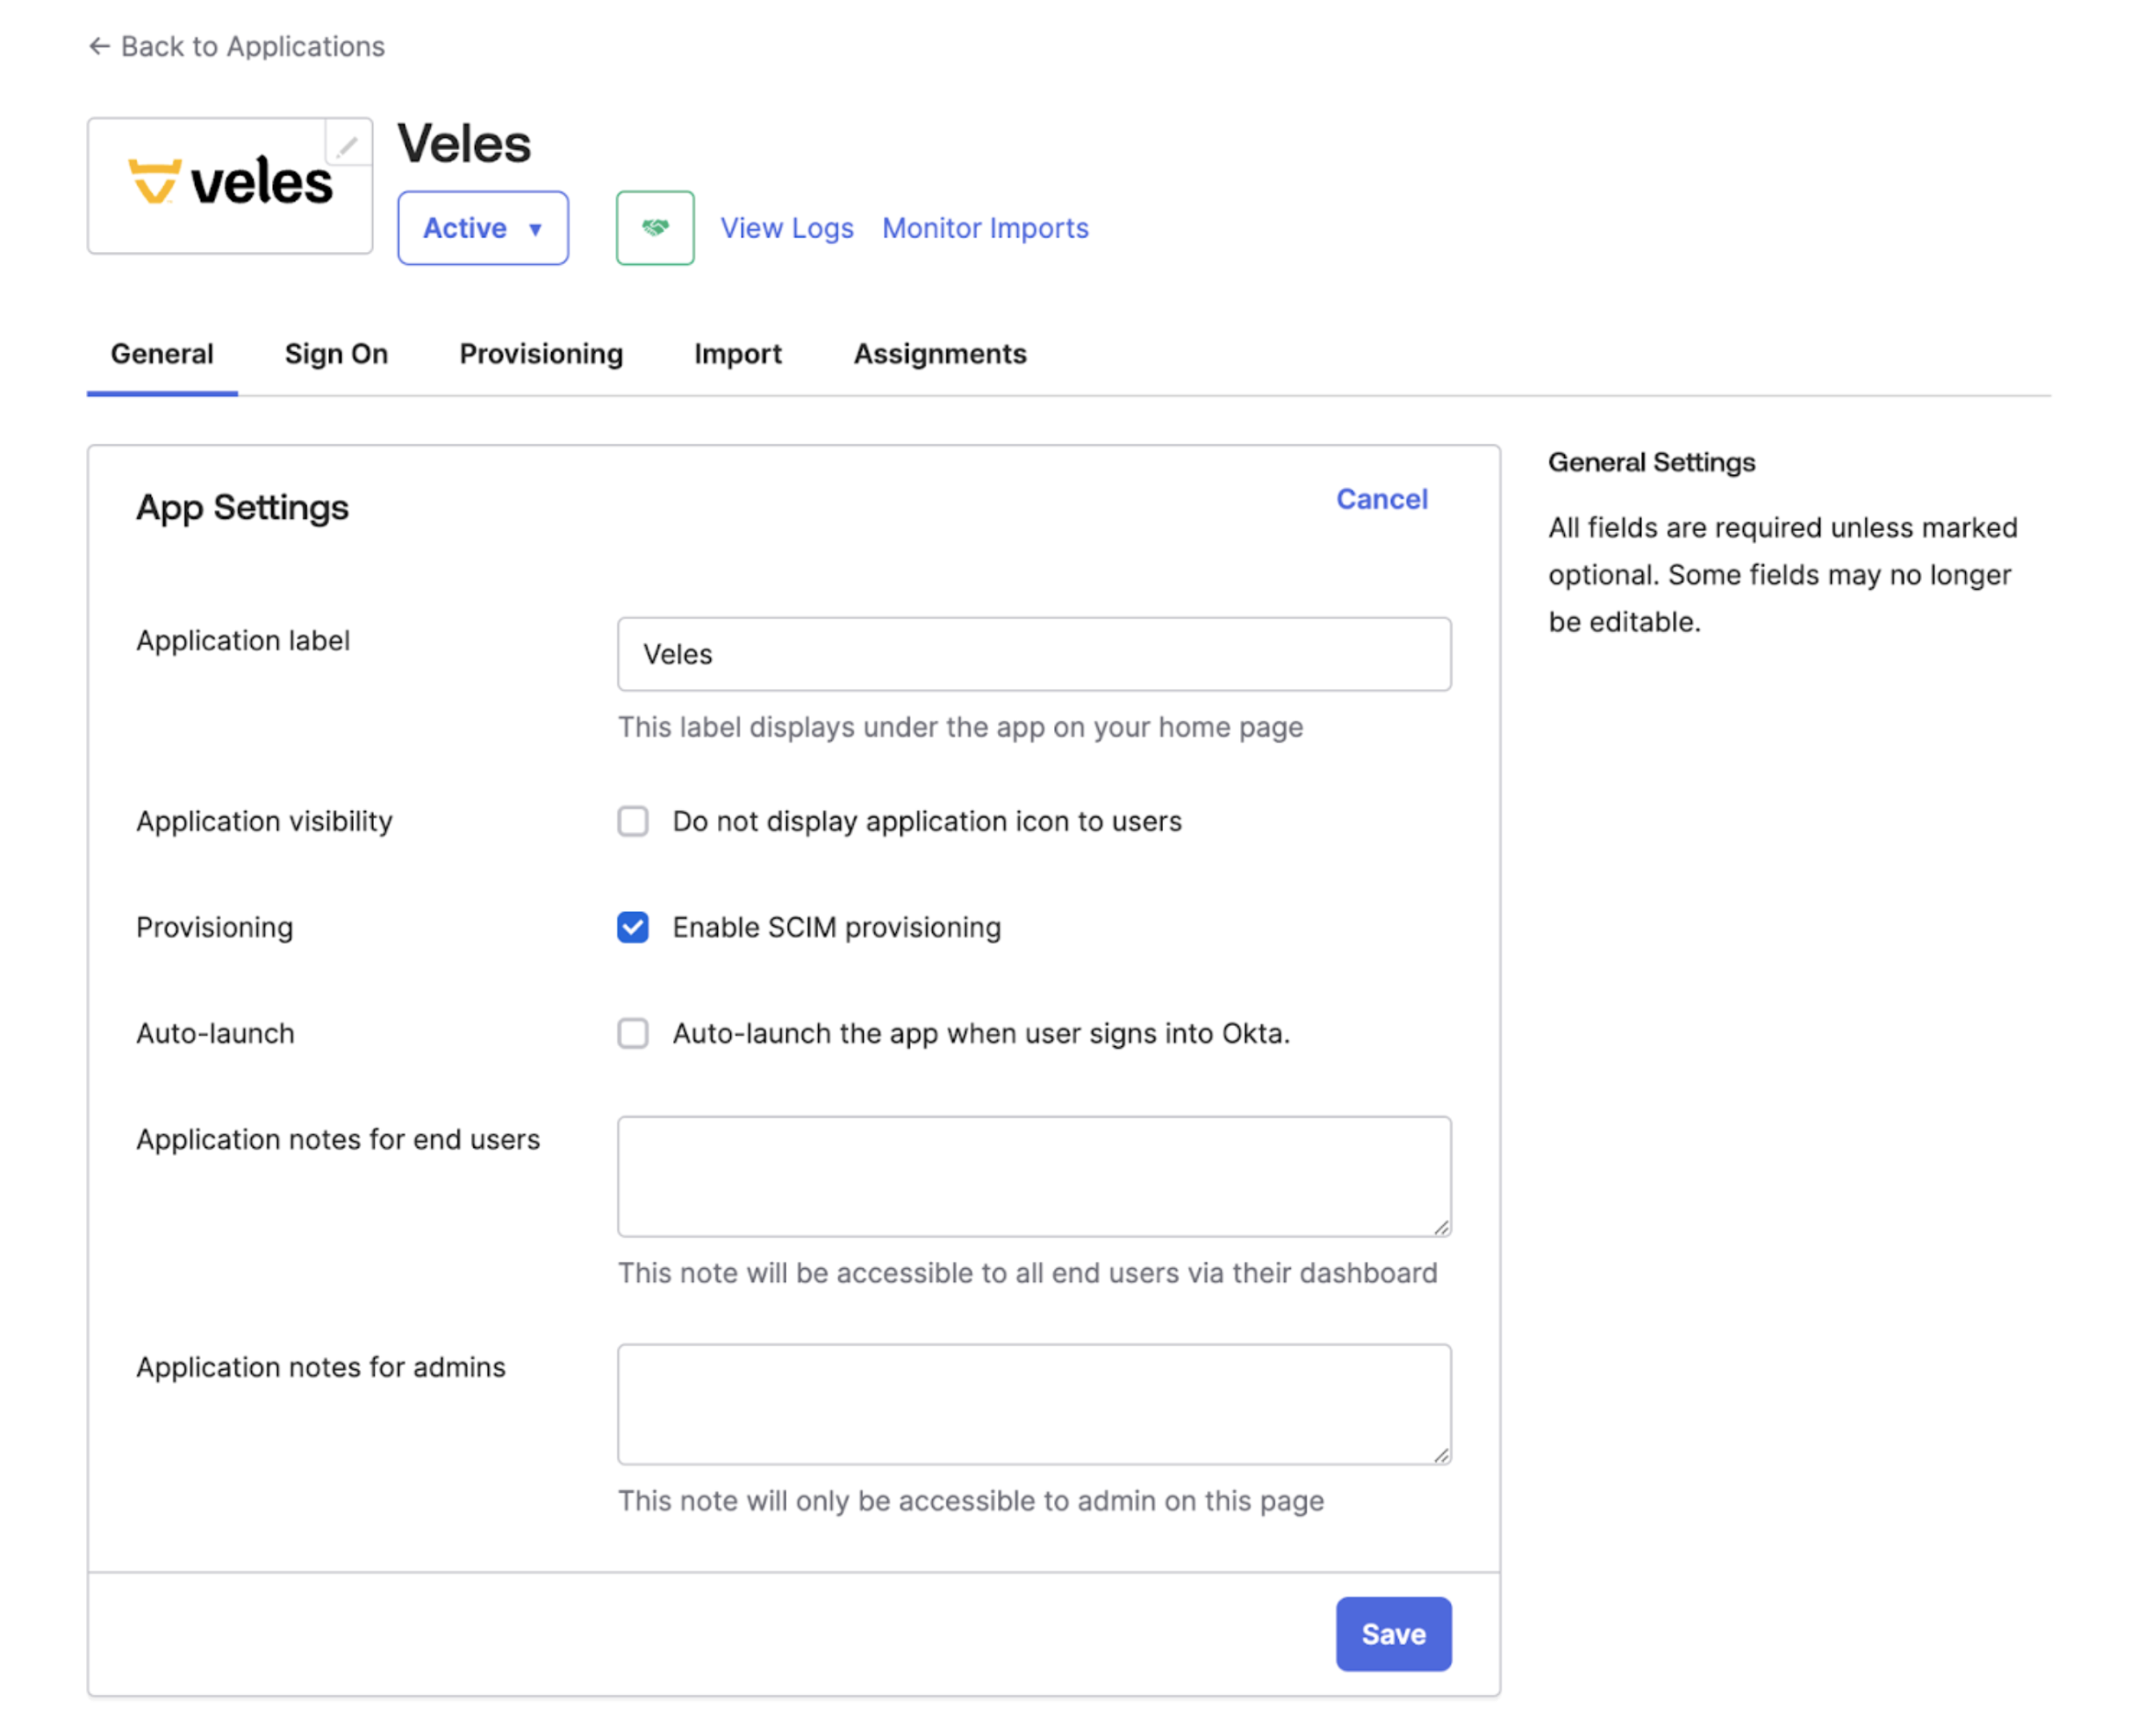
Back in Okta, navigate to the “General” tab of the Veles app. In the “App Settings” area, click on “Edit” and enable SCIM provisioning. Save the settings
10. Configure Provisioning
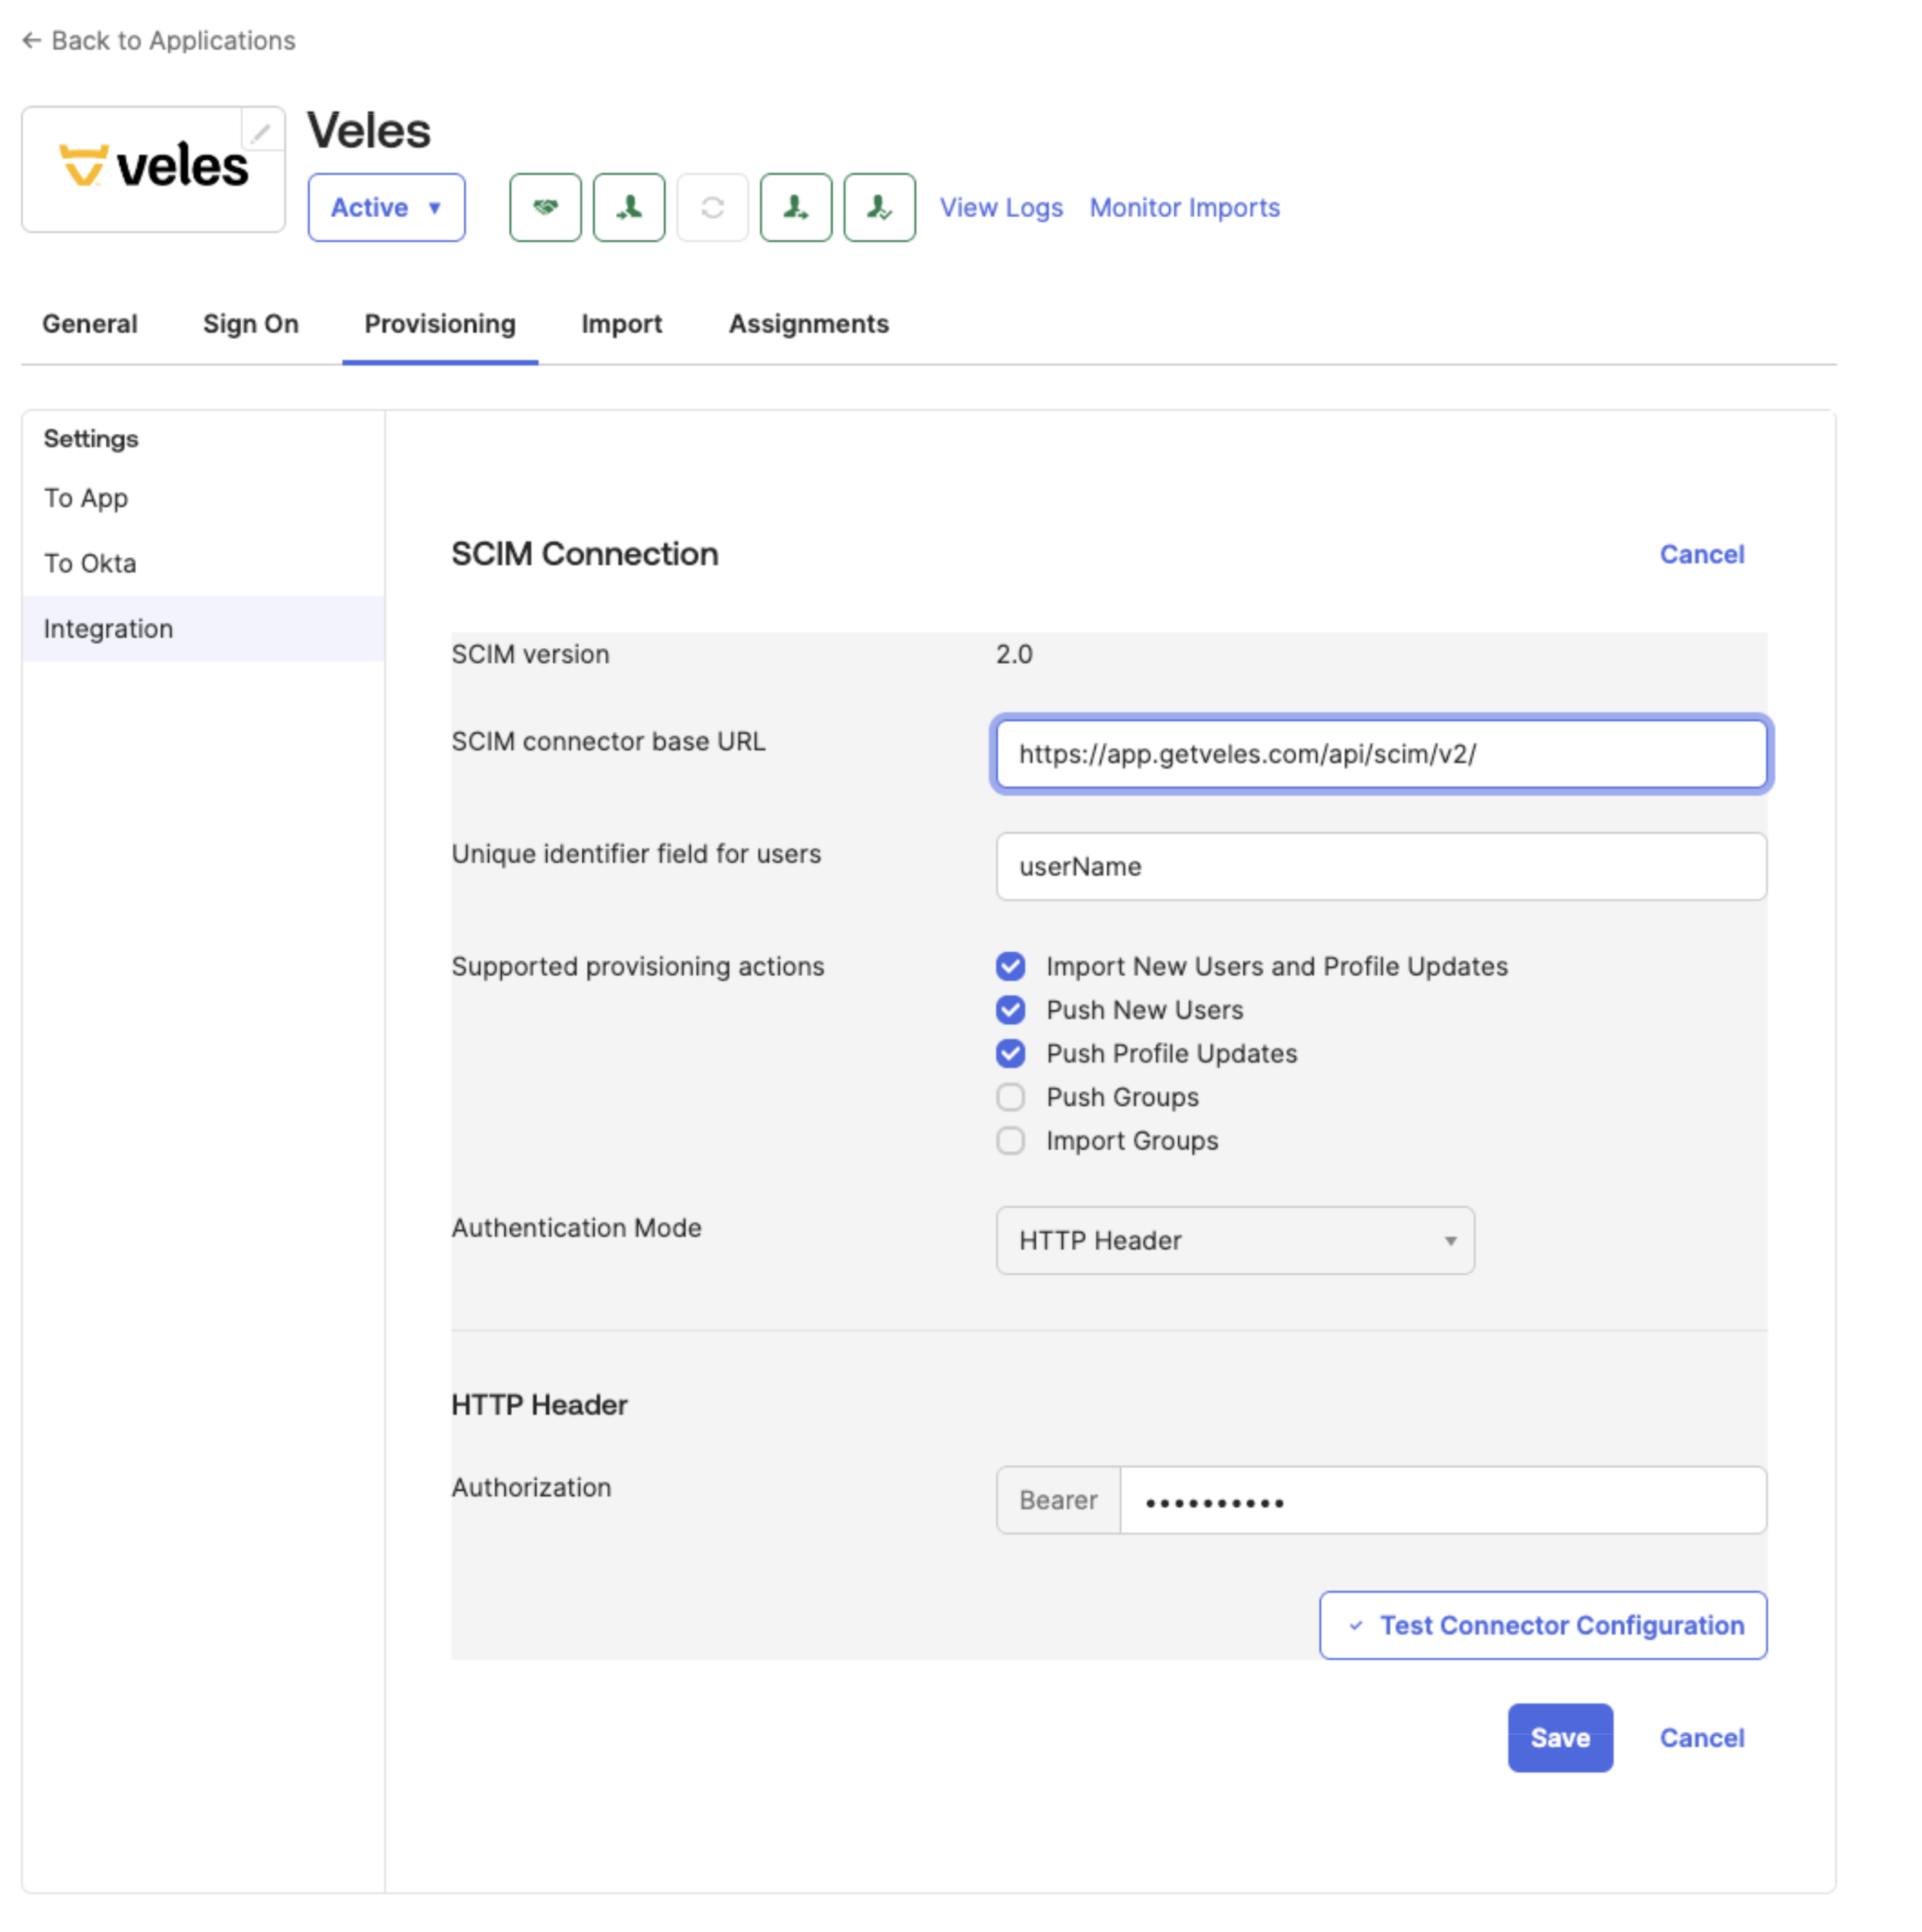
After saving, a new tab called “Provisioning” will be available within Okta. Click on it and update the following settings:
SCIM Connector Base URL:
https://app.getveles.com/api/scim/v2/
Unique identifier field for users:
userName
Supported provisioning actions:
Both user and group actions are supported
Authentication Mode:
HTTP Header
HTTP Header - Authorization
<SCIM Token copied from Veles>
Click on “Test Connector Configuration” and then “Save”
11. Configure ‘To App’
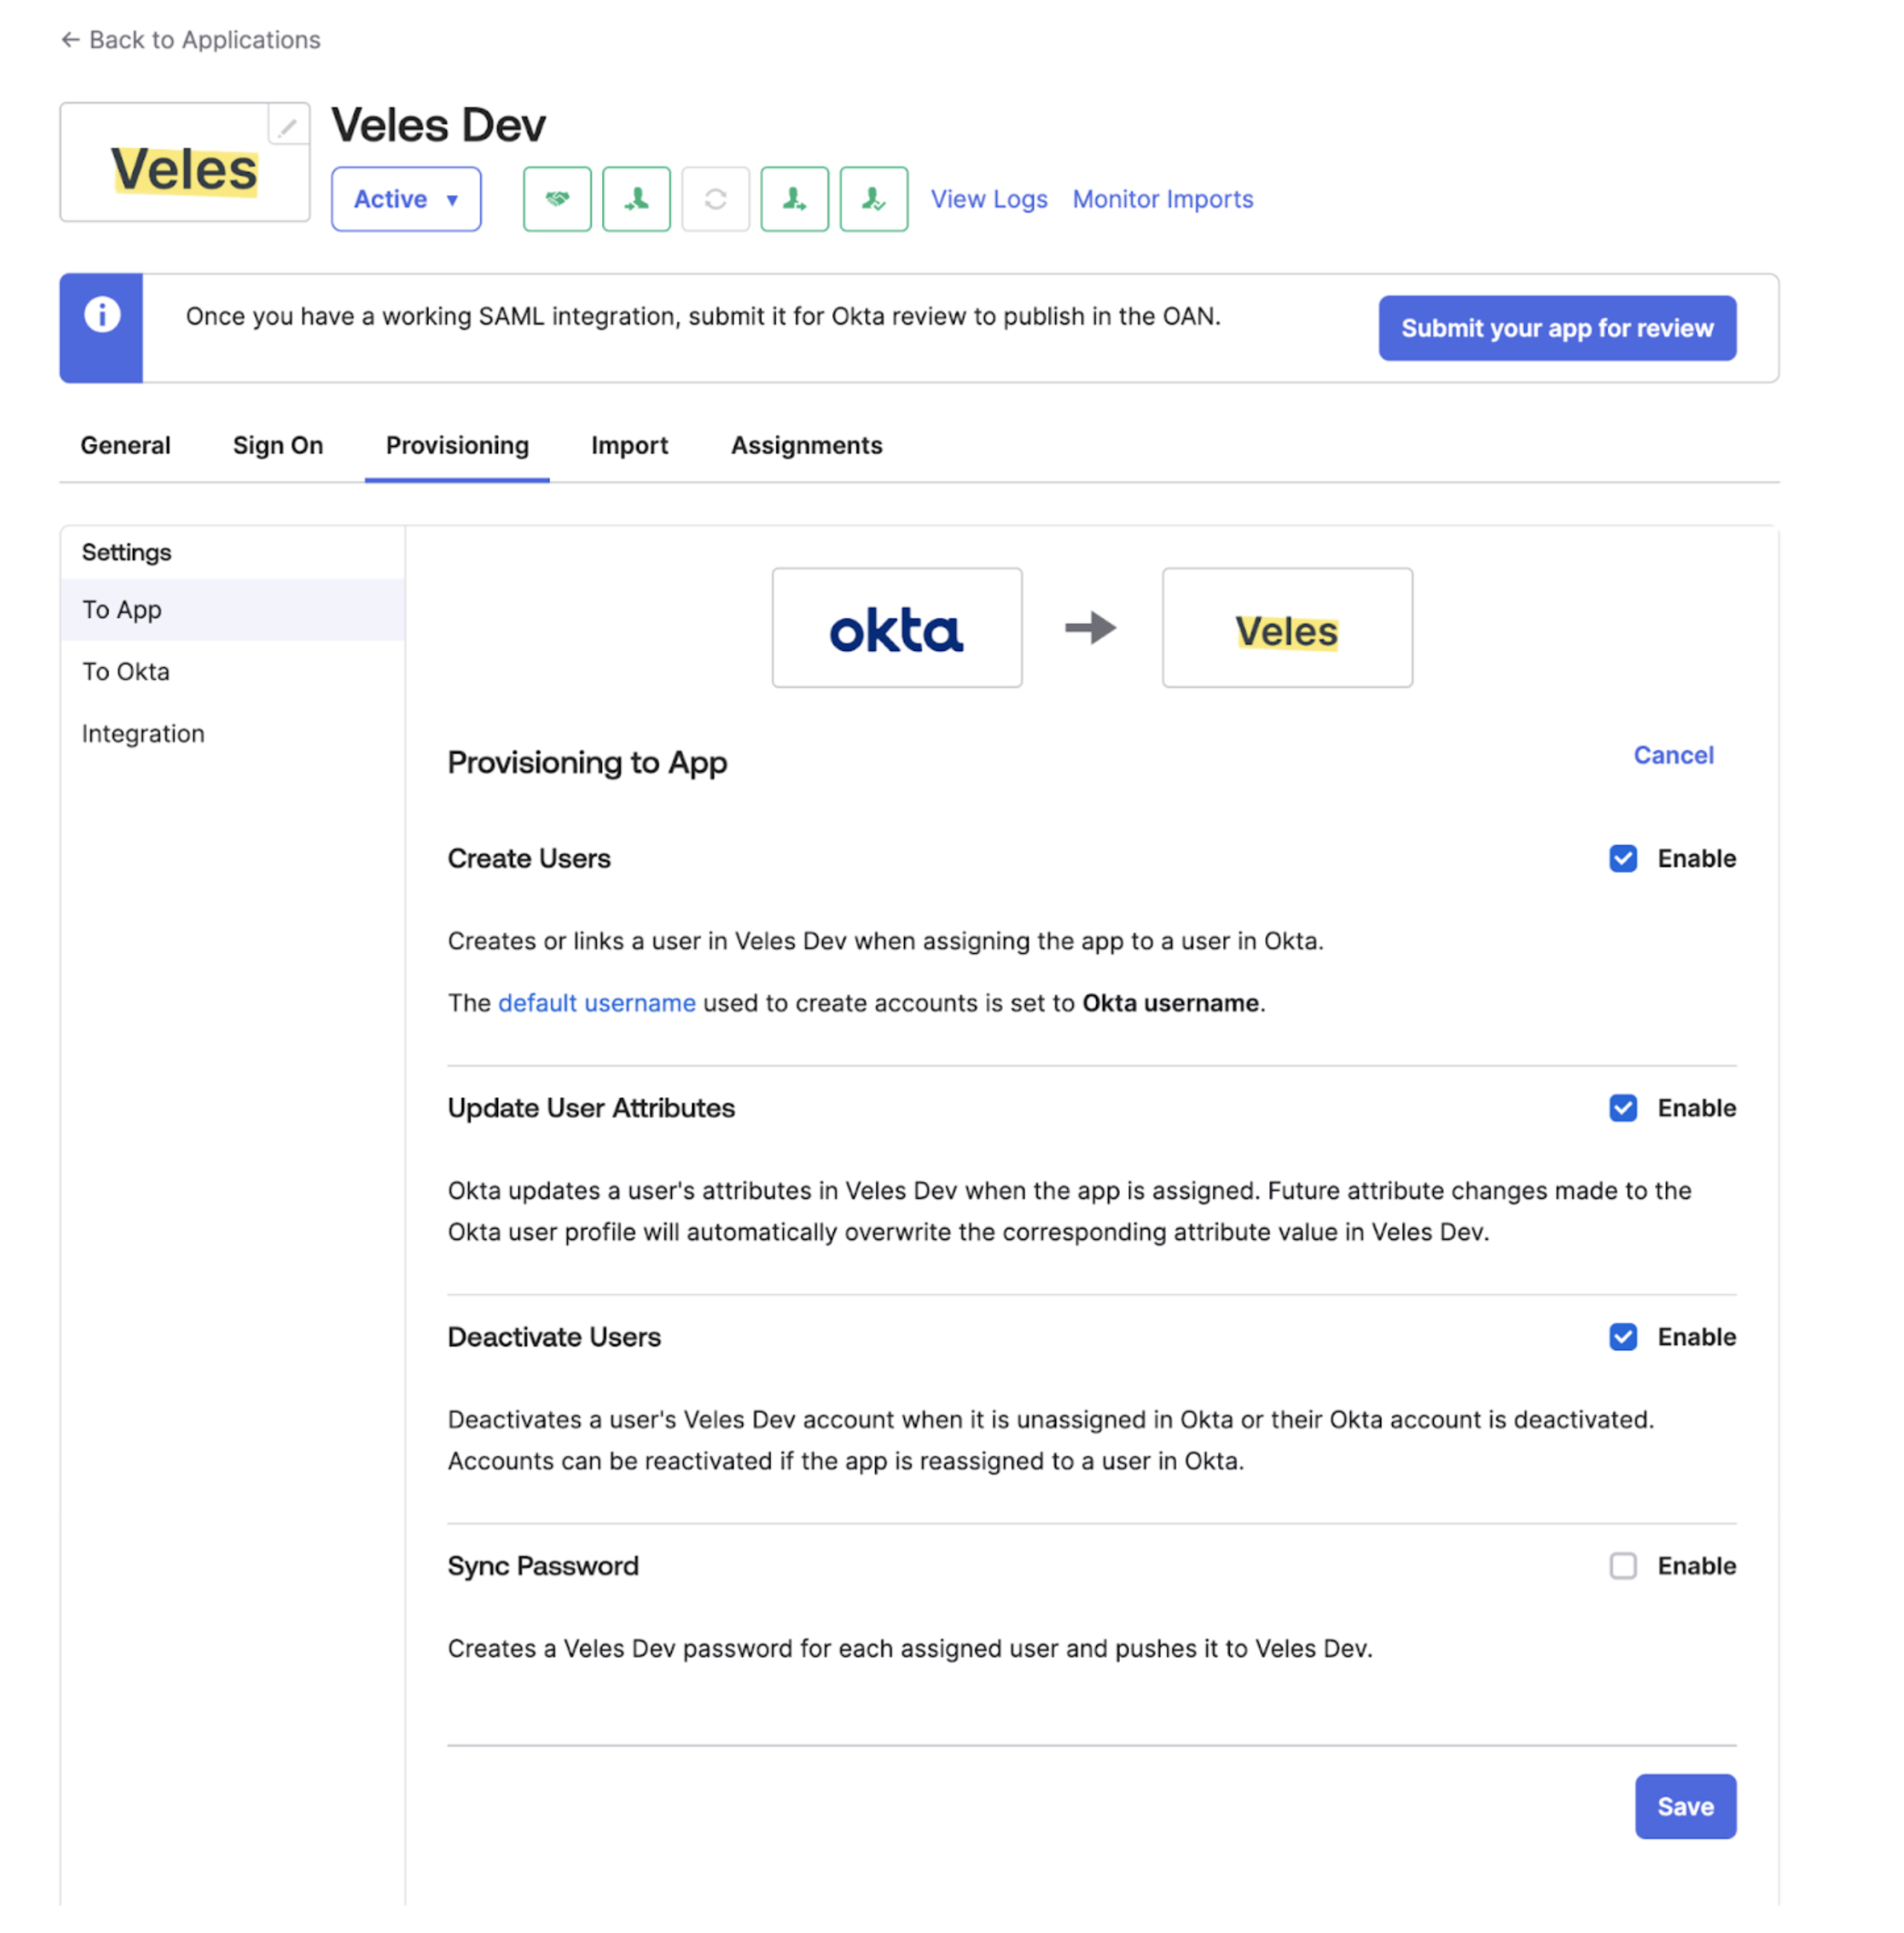
After saving the initial settings, in the “To App” menu, edit the section and check the boxes of features you wish to support
12. Add the Veles Role
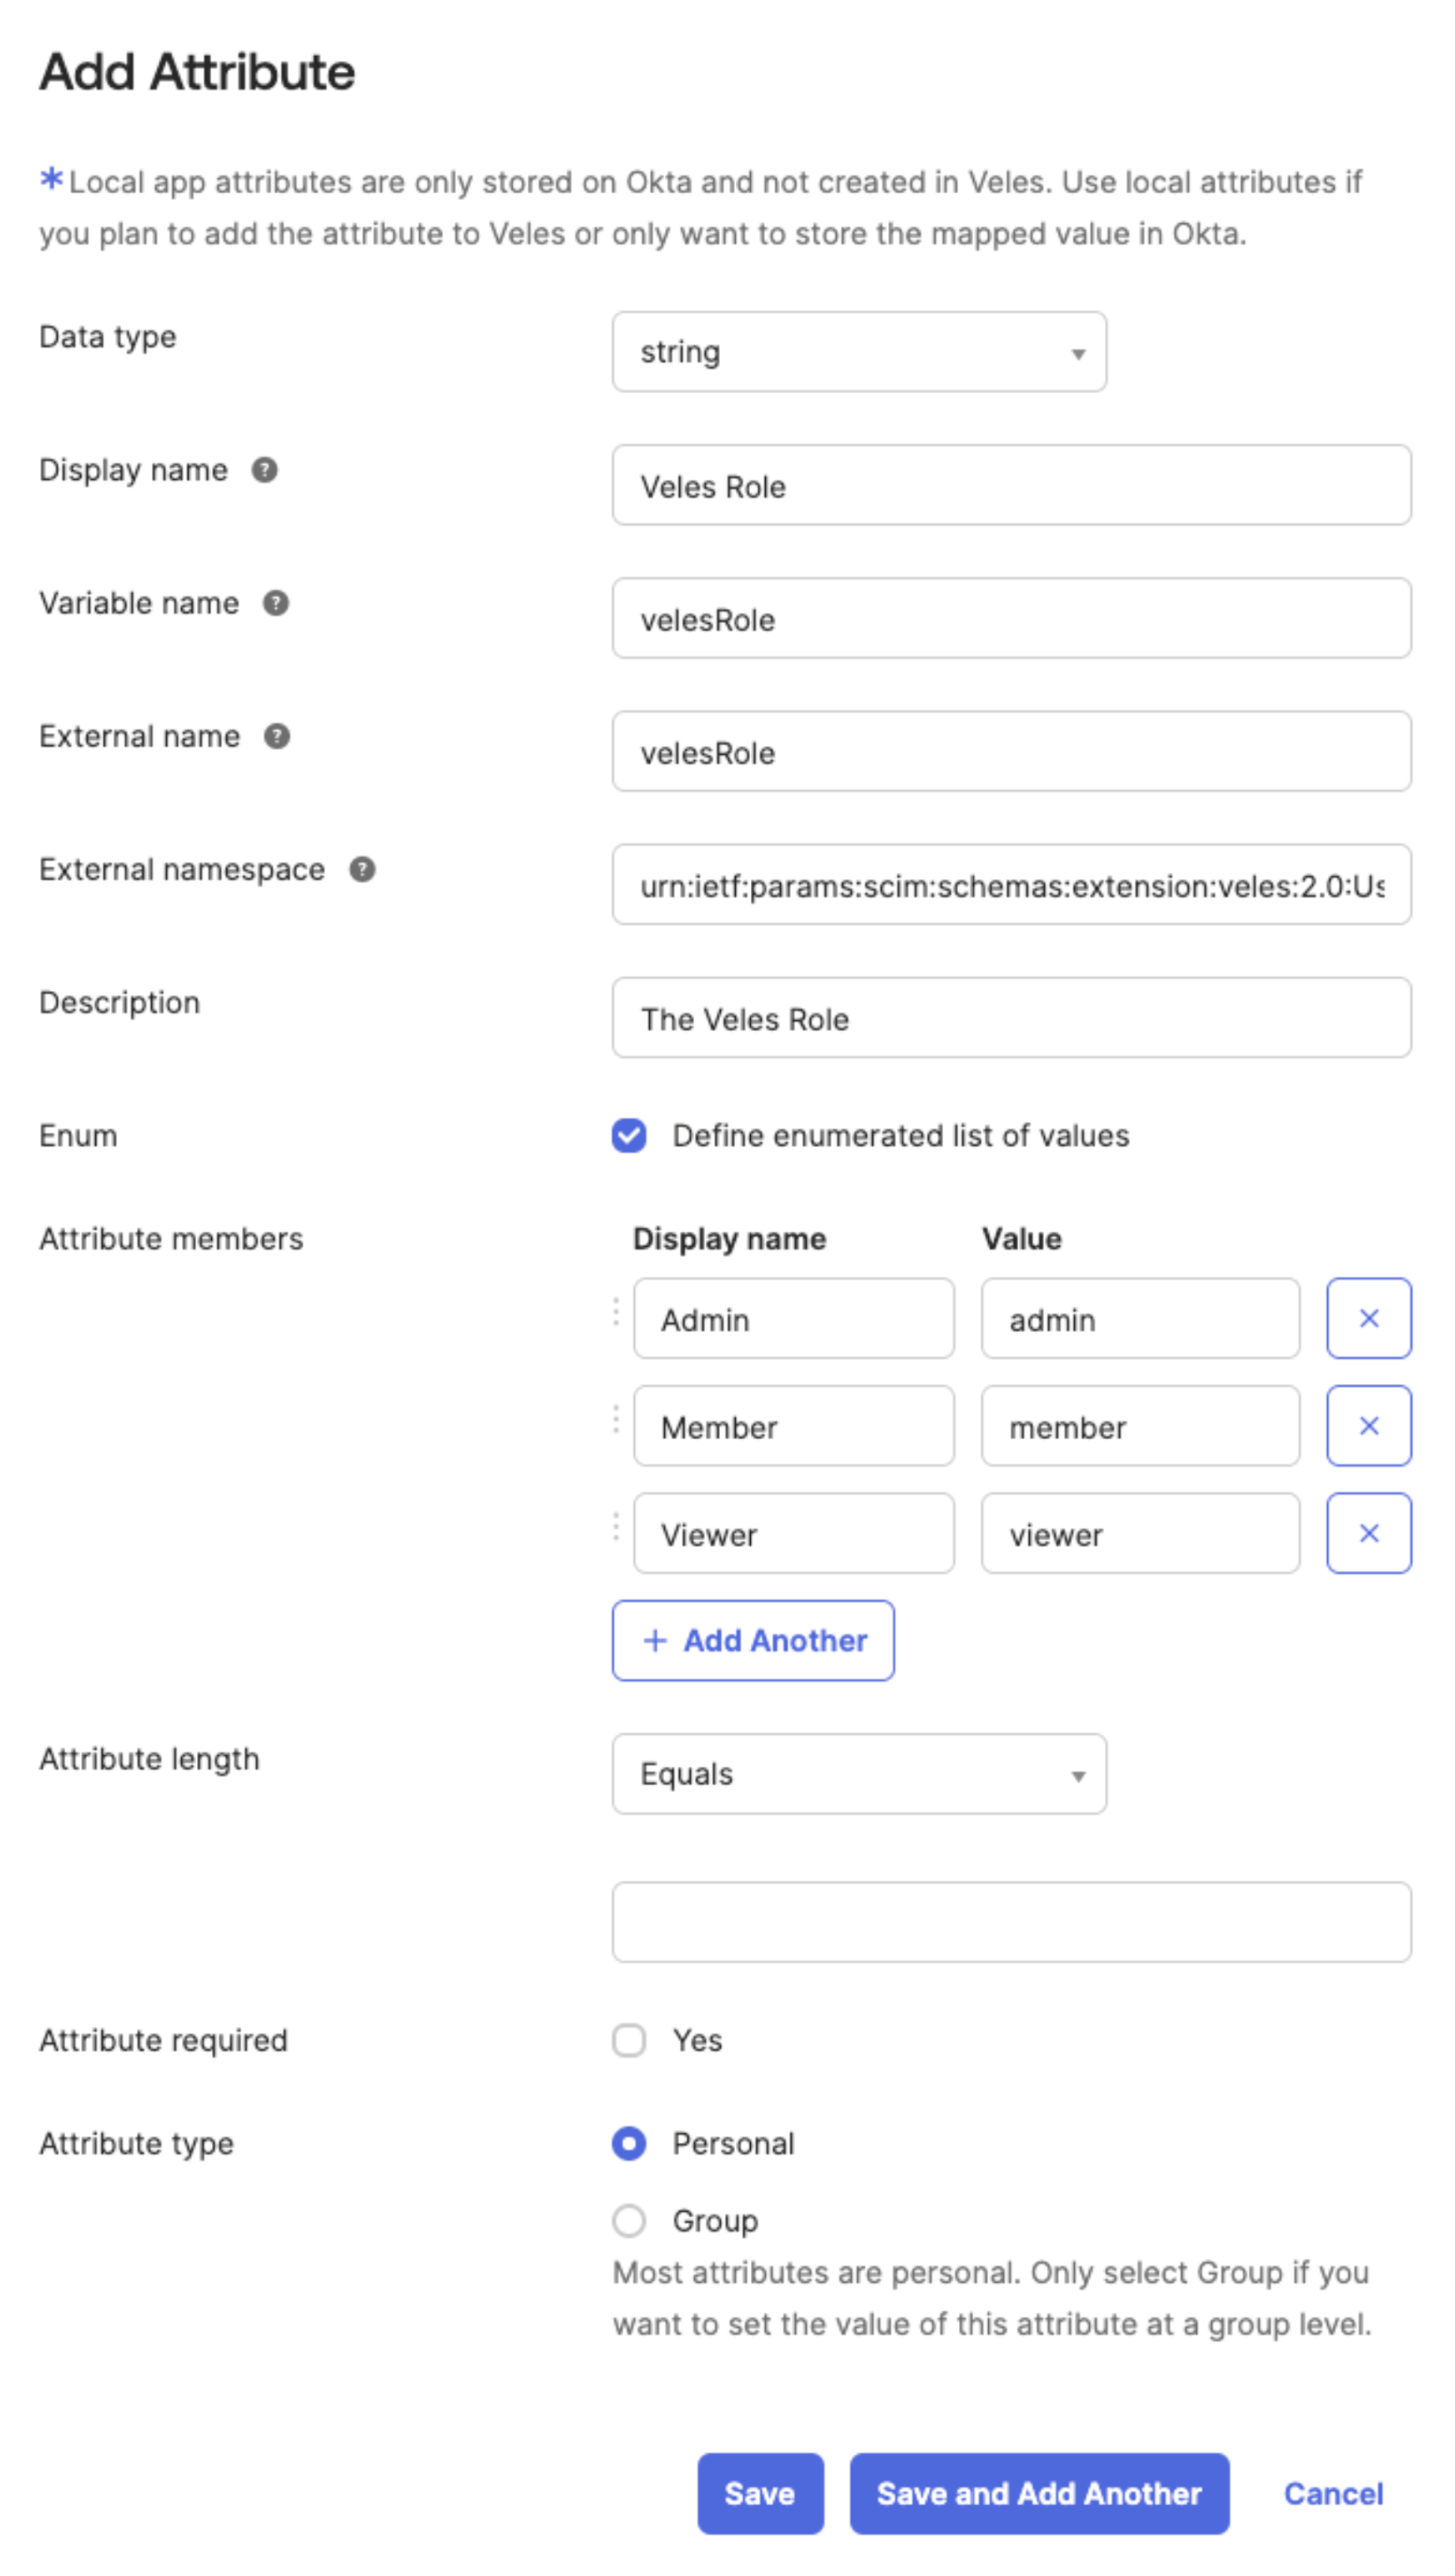
Adding the Veles Role field. The Veles Role field will determine what type of access a user has in the Veles application.
Navigate to the Profile Editor for the Veles App.
Data type: string
Display name: Veles Role
Variable name: velesRole
External name: velesRole
External namespace: urn:ietf:params:scim:schemas:extension:veles:2.0:User
Supported values: admin, member, and viewer.
This field is not required and will default to “member” in case it is not provided.
Admin - full access to all of Veles
Member - full access to the Sales Calculator
Viewer - read only access to the Sales Calculator